ABN: 11 641 139 568

Blog

Understanding Cracks That Can Cause a Problem in a Home

A home is not a home unless it is secure and structurally sound, with no weak points that threaten its foundations. This means that sometimes a homeowner will discover cracks in the walls and ceiling, and they may immediately panic. Luckily, most cracks in all types of homes, even new construction, are completely normal and simply a sign that the house is settling.


If a crack, tear, or hole appears in the walls or ceiling of your home, how can you tell when it is a problem? You’ll find out what to do in this article.


Cracks in Plaster Walls in Older Homes Are a Common but Non-threatening Phenomenon


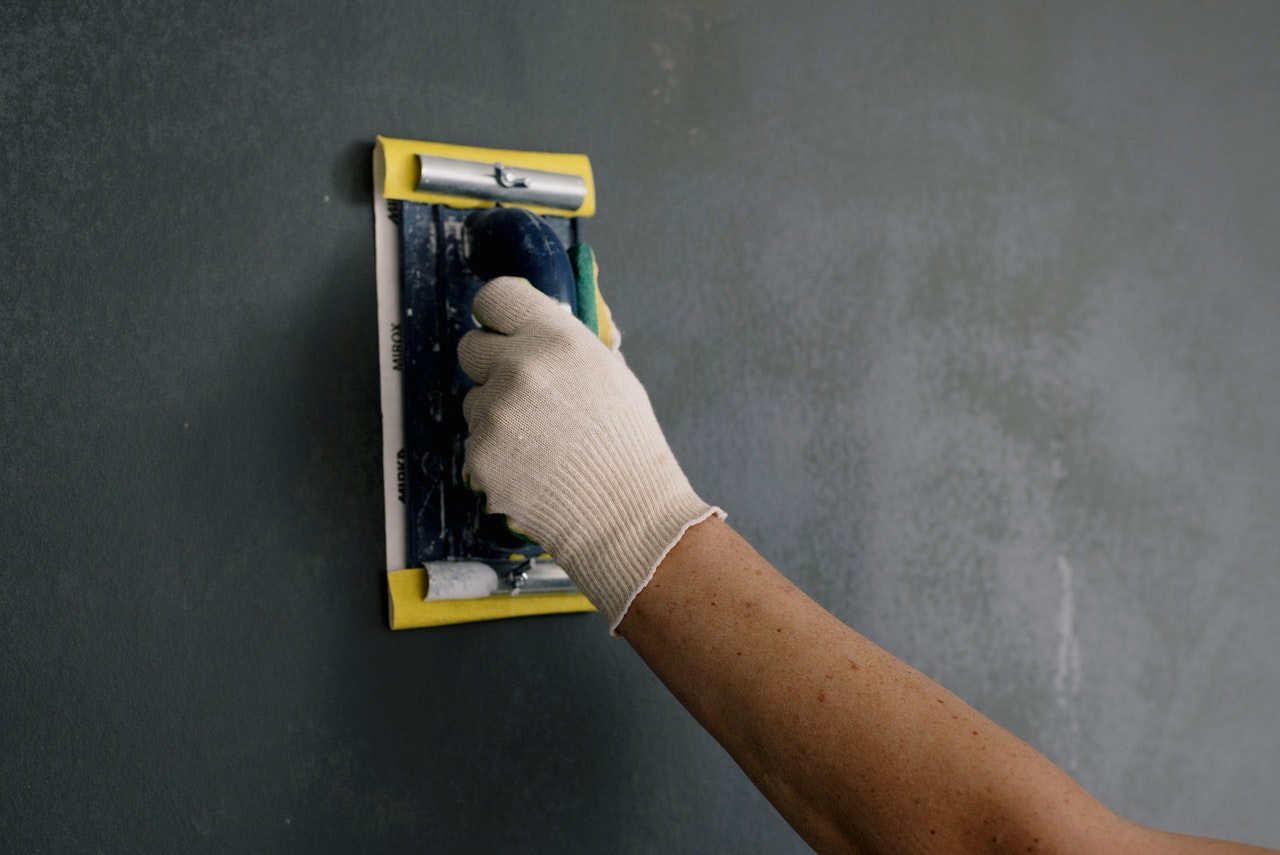
Where plaster walls were covered with wallpaper years ago to hide these cracks, plaster can be repaired by applying a thick coat of plaster to fill the crack and then sanding it smooth. More minor cracks can be filled by using putty. It is easier to repair before painting.


Hairline Cracks That Appear in a New Wall Is Normal


It is usual for minor cracks ranging from less than one millimetre wide to five millimetres wide to appear in new plaster walls. The plaster is the material applied over the wall, not the wall itself. Therefore, if you see cracks in the plaster, they can usually be filled and painted over.


When Do Cracks in a Wall Become a Problem?


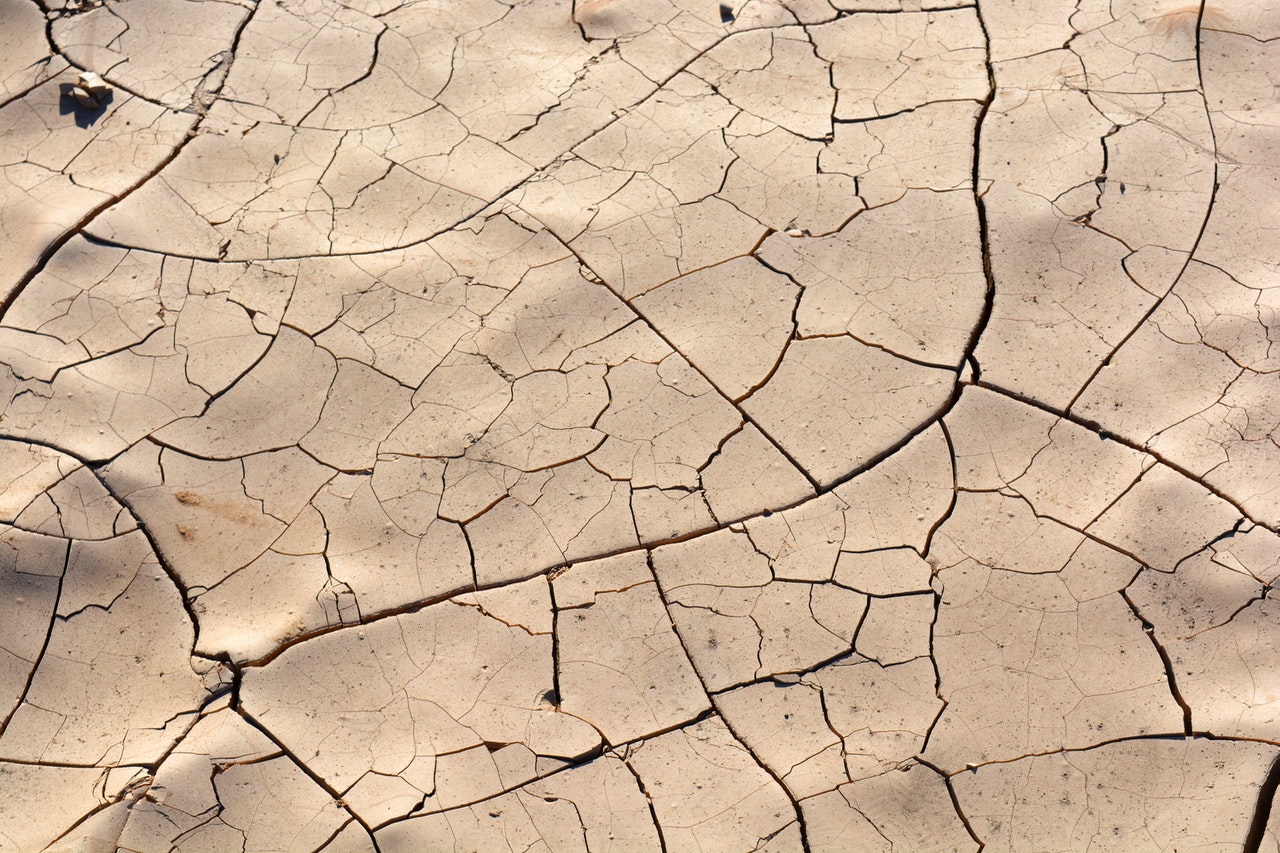
Cracks can develop for various reasons. More minor cracks may appear randomly for no apparent reason and generally aren’t a cause for concern. However, cracks perpendicular to doorways or diagonally through an interior wall may indicate something more serious. 


Diagonal Cracks


When it’s been raining recently, and the walls have gotten damp, diagonal cracks typically form as the walls expand with moisture and then shrink as they dry. 


These cracks are expected, and you won’t be able to prevent them. New homes also have diagonal cracks. Instead of painting over them, wait for the plaster to absorb the excess moisture from the cracks before you paint over them.


Wide Cracks


A large crack of 25 millimetres or wider (2.5 centimetres or one inch) is more problematic, as the cause could be more severe than simply dried plaster or settling. This could mean the building needs underpinning to ensure stability. Or it could mean that the foundation has collapsed, destabilising the whole house.


Jagged Cracks


A crack running diagonally up the wall is a bad sign because it could be coming from the basement. A crack moving up the wall that looks like a staircase is probably a sign of structural movement. You should call in a structural engineer or a foundation-repair expert.


Cracks Around Window and Door Frame


Cracks in the wall near the top of door frames are caused by windows pulling away from the wall, while the crack running up from the bottom corner of a door or door frame indicates a more serious problem. These cracks are often caused by too much pressure applied to the house due to an unsupported wall or inadequate foundation. 


Conclusion


The most common cause of cracks in the walls, like a spider web of brown lines climbing the corners of the ceiling, is temperature or humidity fluctuations, which can result in tiny fissures, cracks, or tiny openings. They are usually not harmful to the house or its inhabitants, though they can cause aesthetic damage.


Shifting foundations cause a much more serious type of crack. They can indicate that the structure is not as stable as it originally appeared to be.
 

Looking for plastering services in Brisbane? We at Plaster & Recruit have a team of professionals who are experts in all aspects of plasterwork and rendering. We can diagnose if the underlying cause of cracks is due to soil settlement or other issues. Contact us today!

6 Tips to Help You Find the Right Sydney Plasterer

There are a lot of plasterers in Sydney, but how do you know which one is the best for your job? After all, you want to hire the right professional for the job. And, if you want the job to be perfect, you shouldn’t be hiring just about any plasterer. You want the best there is, or at least for what you can afford.


So, how do you find the right plasterer in Sydney? Here are some tips to help you choose the best plasterer:


1. Get Recommendations from Friends or Family


If you know someone who has had work done by a plasterer, ask them for a recommendation. Chances are, they will be more than happy to pass on the name of the professional they used. This is a great way to get first-hand information about the quality of work and service you can expect from a potential contractor.


2. Do Your Research


When you are looking for the right plasterer, it is important to do your research. This means looking at different plasterers in your area and finding out what services they offer. It is also important to read reviews of different plasterers so that you can get an idea of their workmanship. Once you have found a few potential plasterers, it is then time to contact them and set up a consultation to learn more about them.


3. Get Quotes


Now that you’ve narrowed down your list of plasterers, it’s time to get quotes from each of them. Be sure to compare apples to apples and get quotes for the same scope of work. This will help you choose the best plasterer for your needs and budget.


4. Ask about Experience


Be sure to ask each plasterer about their experience, especially with jobs similar to yours. You want to be sure that the person you hire is experienced and knowledgeable in the type of work you need doing, as this ensures they know exactly what to do to get the results you expect.


5. Check References


Make sure you’re happy with the plasterer’s references before you hire them. Ask to see some of their previous work, and talk to their previous clients to see if they were satisfied with the work. If you find the general consensus to be quite positive, chances are you’ll have a positive experience working with them.


6. Get Everything in Writing


Make sure that your contract includes a detailed description of the work to be done, as well as the price. Be sure to get everything in writing so that there is no confusion later on, as you can then easily refer to the writing if you need to be clear about something.


Conclusion


By following these tips, you’ll be sure to choose the best plasterer in Sydney for your job. Just remember, the best plasterer is one who has the experience, is reliable and trustworthy, and can provide you with a high-quality finish. So, take your time looking for the right and best plasterer. That way, you can have peace of mind knowing that all your plastering needs will be thoroughly met.


We Plaster & Recruit is a plastering company that provides the best plastering services throughout Brisbane, Gold Coast, and Queensland. If you are looking for a plasterer, reach out to us today!

Choosing the Right Ceiling Paint Colour for Your Room

Plasterers know that there is no one method to paint a ceiling. Even if you choose basic white, there are as many nuanced tints for your ceiling as there are for your walls. If you don’t choose the right one, you may make a mistake that you’ll look at for months or years. 


Here are some suggestions for selecting a ceiling paint colour that best complements your home, regardless of whether you want your ceiling to blend in, harmonise, or contrast with your walls.


Matching the Walls


If your walls are off-white or another very pale colour, the most straightforward answer is to put the same colour on the ceiling. For example, you can have the walls and ceiling all the same off-white colour, with just a trace of creamy warmth.


Using a single colour for the walls and ceiling de-emphasises the spots where various surfaces intersect, instead focusing the eyes on other aspects such as furniture, architectural details, and art.


This is true even if the walls and ceiling are divided by brilliant white mouldings. The ceiling still fades away, but the eye can now see the mouldings, such as skirting boards and cornices.


Overall, using the same mild neutral colour for the walls and ceiling creates a pleasant feeling of peace, particularly when used throughout the home for continuity.


When applied to the ceiling, however, the deeper the colour you pick, the more it might reduce the area. This isn’t terrible if you have a lofty room or want the space to seem cosy. However, if you’re going darker with your walls or your wall colour isn’t neutral, you might want to look into alternative possibilities.


Crisp White Ceilings


A fresh coat of white paint is arguably the most common choice for ceilings, and it’s not a terrible safe decision. However, painting your ceiling white isn’t always as straightforward as purchasing a couple of cans of white paint and calling it a day.


A comparable untinted white for the ceiling can work well in areas with brilliant white walls with no visible undertones to offer a feeling of gallery-like seamlessness.


If your walls aren’t pure white, think about how the tones of the two surfaces will seem next to each other—and if your ceiling paint should match, contrast, or be somewhere in between.


Tinted Ceilings


You can ensure that the ceiling colour corresponds effectively with the wall colour by tinting it with just a tiny bit of the wall colour, whether you’re choosing a deep neutral or a vibrant hue. If you’re going with a rich buttery cream for the walls, go with a ceiling white that has just a little of the same yellowy undertone.


Making the Ceiling Darker


The concept of tinting paints to match may also be applied in reverse. For example, a dark paint treatment in the ceiling cove may draw attention to the architecture and make the area feel more personal.


The colour should have comparable tones to the wallpaper and the trim colour of the doors and mouldings. The warm trim colour is from the same colour family as the ceiling, so no elements conflict.


Having a Contrasting Ceiling


Of course, a ceiling in a colour that contrasts sharply with the walls may be stunning. For example, you might have an extremely pale blue in the ceiling coves and white on the walls for a high-contrast look. Colour coordination isn’t an exact science, but various ways exist to achieve this look.


Conclusion


The key to picking a ceiling paint colour is to choose one that will either effectively blend in with the walls or tastefully contrast your walls and room.


It is crucial to ensure that they harmonise with the room’s configuration. Having a neutral colour on the ceiling may make your space feel more open while using a colour that contrasts may make it visually stunning. Your reliable plastering service may help you decide which colours suit your plastered ceiling better.


Are you looking for a plastering service on the Gold Coast? We Plaster & Recruit provides the best fully licensed and insured plastering services. Get in touch with us today!

Cracks on Plastered Walls – Its Causes and Quick Fixes

Plastering is common in older walls, and cracks are common with old plaster walls. Lime putty is a mixture of water, lime and sand that is used on walls or ceilings. The mix varies in consistency, but it is usually spread thin for a smooth finish.


Some cracks can appear in your walls that look nasty. However, they aren’t serious and won’t cause problems in your home. To make sure you don’t have any issues in the future, consult a plasterer.


Causes of Getting Plaster Cracks


To know the reason behind plaster cracks, it helps to consider what is happening inside the wall. As the plaster dries, it shrinks and gets more complicated.


After lath strips are attached to the wall, a few layers of plaster are layered over it. This brittle plaster can easily crack and break if the house settles or bump into it while moving furniture.


Weak Spots in Plaster


You’re most likely to see cracks along the joints between studs and joists, as well as in the ceiling or floor frame. This is also true of walls.


Plaster cracks over time because it’s hard and brittle; it doesn’t like to settle. Instead, it spreads in diagonal angles. Small cracks in a wall are typica from blunt force. Also, cracks in walls can fluctuate seasonally due to temperature changes.


There’s a possibility that corners of doors and windows in the house may have cracks because they absorb the stresses of shifting in place.


Cracks as a Sign of Foundation Issues


If your home has cracks in the walls, a foundation issue is likely to blame. If you see new cracks in the plaster and your basement has cracks in it, your foundation may be settling or shifting.


Check with a structural engineer to ensure the foundation isn’t settling or shifting.


Fixing Plaster with Simple Cosmetic Techniques


If you need to fill a crack with plaster to make it blend into the wall more seamlessly, simply lay a strip of caulk over the damage and then paint over the caulk.


  1. Use acrylic latex caulk to seal the crack by applying a thin layer in the form of a bead.
  2. Rub the caulk into the crack with a finger to force it into the crevice.
  3. Use a damp sponge to wipe off all excess caulk, so it is flush with the wall’s surface.


When Plaster Comes Off in Chunks


When plaster cracks, there is always the danger that the plaster will come off, and water will get in to affect the integrity of your walls. Because of this, it’s vital to investigate new cracks in the plaster.


Plaster not allowed to form keys can crack and fall off the wall, damaging the surrounding plaster.


If you love the plaster walls of your home, don’t worry about them breaking. Plaster is quite strong, which is why it is used in most older homes.


Conclusion


Plaster walls are strong, durable and serve as a moisture barrier. If cracks appear in the walls of your home, most likely they are cosmetic problems. If a crack creates a weak point, additional support may need to be added.


To ensure to seal and repair cracks in plaster, it would be better to reach out to registered plastering company like We Plaster & Recruit. We offer plastering services across throughout Brisbane, Gold Coast and Queensland areas. To get assistance and proper maintenance for your walls, contact us today.

What Are the Most Common Causes of Your Ceiling Cracking?

More often than not, cracks in the ceiling indicate a far more serious problem than just aesthetic damage. If you are aware of any water leakage into the attic, water damage, or other roof problems, call a professional repair company to address these issues.


While serious problems should be addressed by a professional, minor ones can be dealt with on your own. This is especially true if you can patch up the cracks in the ceiling using the small equipment that comes together with most drywall repair kits. 


Though you may find yourself dealing with other problems in the future, you will at least be able to squeeze a few more years out of your ceiling until you can afford a complete replacement. If you want to learn more about the most common reasons your ceiling is cracking, read this article.


Truss Uplift


This is probably the most common cause of cracking in a ceiling. When your ceiling starts cracking, it is most likely because the ceiling partially supports the weight of the building, and the rest of it is supported by the walls. When the walls support more weight than the ceiling, the ceiling will start to crack.


The good news is that it is a relatively simple problem to fix. You must put supports under the ceiling to redistribute the load. If you have an old house with an old roof, this is probably a problem you have had to deal with at least once.


While fixing the ceiling on your own is a reasonably simple procedure, you should ensure that you take the appropriate safety precautions. If your house is old, there is a chance that some hazardous materials are in the attic, including asbestos, lead paint, and other dangerous materials. If you are worried that you may be exposing yourself or your family to these dangers, it is better to hire a professional.


Failed Joints


Ceiling joints are a common source of problems in a ceiling. The joints are usually created when the drywall is installed and is sealed using mesh tape. If the mesh tape is not adhered correctly, it will not provide support to the joints, and the ceiling will start to crack. In addition to the cracking, there is a risk of the material behind the crack being damaged or falling off.


While fixing the problem is fairly simple, the process may be more complex than it appears at first. If you don’t know how to do it properly, you may end up causing more damage to the ceiling. If you notice cracks in your ceiling, you should contact a professional for repair.


Mould


It is a common misconception that mould is only a problem in the damp basement. While mould does tend to flourish in cool, moist environments, it can cause severe damage to your ceiling. When you have mould growing in the cracks in your ceiling, you are not just dealing with aesthetic problems; there is a risk of serious health issues.


If you notice mould in your ceiling, you should address the problem as quickly as possible. If you are not sure where the mould is coming from, hire a professional to check up on your roof and make sure that there are no water leaks.


Warped Joists


Sometimes the warped joists are the cause of the cracking in your ceiling. This is more common in older houses with wooden roofs. If you have recently had some rain in your area, you should inspect your ceiling for cracks. This is especially true if you have noticed some water leakage from the roof.


If your roof is old, you may have to replace it entirely, in addition to repairing the ceiling. The first step is to hire a professional to inspect your roof and determine the cause of the damage. In some cases, this may be just a minor problem that can be quickly dealt with.


Conclusion


Having a ceiling crack is a problem that most homeowners have to deal with at some point. While there are many reasons why the cracks appear, removing them is simple. The best thing to do is to hire a professional who will be able to inspect your ceiling and determine the source of the cracks. While patching the cracks is a relatively simple procedure, it is not something many homeowners can do properly.


You should also make sure to call a professional if you notice water leakage or some other problem with the roof. If your ceiling is cracking, there is a chance of other issues with the roof, which will cause more problems in the future. 


Are you looking for plaster supplies in Brisbane? Trust We Plaster & Recruit. We are a registered plastering company providing the best plastering services with operations throughout Brisbane, Gold Coast, and Queensland. Request a quote now.

Everything You Need to Know About Gyprock for Modern Homes

A lot of people get confused between plaster and a gyprock. A lot of modern houses today have gyprock mounted on their buildings; and it’s also one of the most commonly used building materials globally. This is because gyprock consists of a compact plaster sheet. 


The Benefits of Gyprock for Homes


There are a number of benefits of using gyprock compared to other building materials. The benefits mentioned below are only a few of the most prominent advantages of gyprock.


They are Affordable


One of the greatest advantages of gyprock is that it is affordable building material. Gyprock is quite cheap compared to other building materials, which is one of the reasons why gyprock is so popularly used as wall finish in modern homes.


They are Durable


Gyprock is a building material that is quite durable. When gyprock is used as a wall finish, they are known to stand the test of time. Even if gyprock is exposed to water, wind and sun, it will still be able to stand the test of time.


They are Water Resistant


Gyprock is naturally water-resistant, making it a very popular material for use as wall finish. With gyprock, you don’t have to worry about mould forming on your walls, and you don’t have to worry about water and wind damage to your walls.


They are Lightweight


Gyprock is fairly lightweight compared to other building materials, making it an ideal building material for homes. This also makes it easier for you to carry gyprock to your construction site and to transport them to your home once they are installed.


They Don’t Require Drying Time


Gyprock is able to be installed on walls immediately after installation. After gyprock is applied, it will dry within a few hours, unlike other building materials that can take up to a few months to completely dry.


What Does a Gyprocker Do


A gyprocker is defined as a person who installs gyprock in buildings. They are also responsible for maintaining gyprock, including fixing and repairing gyprock that is already installed. Some modern gyprockers are also able to do finish work on gyprock, for example tiling and rendering on top of gyprock.


When gyproc is installed on the walls of houses, they form a protective layer that protects the house from mould and water damage. This is what makes gyprock a very popular building material used in modern homes. However, before you can install gyprock on the walls of your house, you need to make sure that you hire a good gyprocker to do the job for you.


How to Find a Good Gyprocker


Finding a good gyprocker is not an easy task because gyprock is a very popular building material nowadays; it is also an important building material for houses.


Below are a few tips on how you can find a good gyprocker.


Get the Word of Mouth


Ask your friends, family, and family members if they know a gyprocker they can recommend. Word of mouth is one of the most effective ways to find a good gyprocker. The gyprocker you ask them to recommend might be a relative or a friend of theirs, and this means that you can trust the gyprocker that they are recommending.


Check the Associations


Another way to find a good gyprocker is to contact the local gyprock installation services and gyprock repair services and ask them if they are hiring. Most gyprock installation services and gyprock repair services will have a website that you can visit, and if you visit it, you should be able to find information about how to contact them.


Check the Gyprocker’s References


When you find gyprockers that you want to hire, you can check their references before hiring them. Each gyprocker will usually have a list of recommendations and references to give to you. Contact the people who provided the references and ask them if they were satisfied with the gyprock installation and the gyprock repair services.


The Bottomline


Gyprock is one of the most commonly used building materials in the world. They are affordable and very versatile, which makes gyprock the ideal building material to use in modern homes.


Looking for Gyprock in Brisbane? We Plaster & Recruit is a registered plastering company throughout Brisbane, Gold Coast and Queensland areas. We are fully licensed and insured. Get in touch with us.

Tips on Removing Drywall Sheeting: Do You Need Expert Help?

You might want to take the drywall out of your house for a few reasons. You could be renovating your home and wishing to remove internal walls or install an air conditioning duct, or you might just be repairing a small section of the damaged wall.


With a few standard tools, removing drywall sheeting is a task that a competent DIYer can complete. Here are the tools, equipment, and steps you need to go through to remove drywall sheeting:


  • A dust mask will protect you from the debris.
  •  
  • You’ll need a utility knife to cut through the drywall.
  •  
  • A drywall saw will make cleaner cuts than a utility knife.
  •  
  • A hammer with a claw can be used to remove nails.
  •  
  • A prybar will help you remove moulding.
  •  
  • A stud finder will help you avoid hitting electrical wires.
  •  
  • Masking tape will help you create clean lines.
  •  
  • A strong magnet can be used to hold screws in place.
  •  
  • A drill with screwdriver bits will help you drive screws into the wall.
  •  

If you need to remove drywall from your home, it’s not as difficult as you think. Just follow these simple steps, and you’ll have it removed.


1. Turn Off All Utilities


Before removing any drywall, it’s essential to turn off all utilities that may be located inside the wall cavity. A good stud finder can help you determine what is behind the wall.


2. Prepare the Room


Removing drywall sheeting can create a lot of dust, which can settle on furniture, windowsills, and walls. To avoid spending hours cleaning up, take some precautions to keep the dust from spreading.


To make cleaning quicker and more accessible, it’s best to prepare the room before you start. Remove any furniture that isn’t needed and try to isolate the workspace by closing doors and windows.


If you can’t move your furniture, you can cover it with plastic drop sheets to keep drywall dust from settling on it. The size of your project will determine how much preparation you’ll need to do.


3. Start Removing the Plasterboard Sheets


The stud finder will help you locate utilities and areas that require extra caution. Use masking tape to mark these areas. You may need to remove skirting boards, baseboards, window moulding, and cornices – anything attached in front of the drywall sheeting – depending on the scope of your project.


Use the utility knife to cut the drywall tape along the edges of the section of drywall you want to remove. This wall will have corner sections and possibly sections where the ceiling and wall meet, plus sections where individual sheets of wallpaper join. If you can’t figure out where pieces of drywall fit together, just cut the drywall tape when you find the seam.


Afterward, use the drill and screwdriver bits to remove screws if they have been used. Find the screws with the magnet and drill, and take them out. Unscrew all the screws from the sheet or section you want to remove.


Start at one end of the drywall sheet, and pry it up gradually with a prybar. Work your way across the sheet until it is completely removed. To remove the drywall, start by breaking it into manageable pieces. Then, use a saw to cut around the section you want to remove.


Remove any nails left in the timber framework. Use a claw hook hammer or pry bar to remove the pins. 


Conclusion


Removing drywall sheeting can be tricky, and you must know the dangers involved. Use the right tools and precautions, and you should be able to remove drywall sheeting easily.


After finishing your wall removal, the next step is to fix any issues you uncovered when you removed the drywall. Locate the cause of the leak and repair it. If you find any damage to the timber framework, repair or replace it.


For extra assistance removing and reinstalling a dry wall in your home, feel free to contact We Plaster & Recruit. Our team has full licenses to provide plastering services throughout Brisbane, Gold Coast and Queensland. Simply contact us today, and we would be glad to lend a hand with home plastering projects.

Ways to Ensure Your Walls Last a Long Time

You might not recognise it initially, but your walls are one of the things that other people see once they set foot inside your home. Whether you have an open floor plan or closed-up rooms, these walls must be a point of interest. Because of this, they have to be something you can be proud of.

That’s why you must determine what could be affecting your dry wall’s appearance and what you can do to ensure it will last a long time. After all, if you want to avoid the cost of constant repairs, it’s best to pay attention to the following drywall issues.

Make Sure They Are Plastered Well

Plastering pertains to applying the finishing layer of drywall onto a mudded wall. This layer serves as a protective cover over the wall’s wood or metal frame. If you did not correctly do this layer, it might appear evident once you stare at the border. You’ll see uneven patches or bumps that are not supposed to be there.

Ensure the Paint Lasts

Painting your walls is one sure way to bring out the best in your home. It exudes elegance, peace and tranquillity. However, the effort is for naught if the paint fades or chips in the long run.

The best thing to do is apply two coats of paint for better effect. This is especially true for medium or dark colours. Choosing a suitable primer for the paint to stick to the surface is also a good idea.

Avoid Excess Humidity

Like with any other wall type, humidity is a significant factor when it comes to drywall. When you do not maintain your home’s humidity levels to a certain degree, the drywall will start to crack and fade.

To manage the damaging moisture in your home, you can use a humidifier when the humidity levels are below 30 per cent to protect your walls from being too dry. Alternatively, you can always use the dehumidifier when it’s above 50 per cent. It does the opposite of the humidifier by sucking out all the moisture to the outside.

Check for Cracks

Cracks are common in aging walls. They might start from the structural joints but can sometimes spread to the wood or metal frames. You might have to replace the walls with newer ones if there are cracks.

One way to check this is to tap at the wall by hand. If it sounds hollow, chances are there are some air pockets between the base and the plaster. It’s best to be proactive about this so that the crack won’t spread.

Of course, you wouldn’t want to spend money on something that you can repair. So why not employ drywall company services that can help you with this? You can trust them to do an excellent job without any hassle. Though it’ll cost you some money, it’s worth it in the long term. 

Final Thoughts

Ensuring your walls last a lifetime requires proper maintenance and care. If you neglect them, you’ll spend more on repairs and replacements.

We Plaster & Recruit can help you if worse comes to worst. We are a registered plastering company that can provide you with high-quality dry wall services on the Gold Coast. Contact us today!

Guidelines and Procedures for Removing Drywall Sheeting

There are several reasons you might want to remove drywall from your home. These include needing to install an airduct, repairing a small section of the wall, or simply having renovations. 


Thankfully, drywall sheeting can be easily removed with a few simple steps. This guide will help you understand the process and do it properly. 


Before you start your project, there are a few things you need to do to prepare. They are as follows: 


1. Shut off All Utilities  


Utilities such as electrical wires, plumbing pipes, and gas lines are often located behind wall cavities. A stud finder can indicate what is behind the drywall sheet you intend to remove. However, it is always best to shut off all utilities before starting any drywall removal project.


2. Ready the Room


Before starting your project, take some time to prepare the room. Remove any unnecessary furniture and isolate the workspace by closing doors and windows. If you can’t move the furniture, cover it with plastic drop sheets to prevent drywall dust from settling on it. The size of your project will determine the level of preparation required.


You’ll need the following tools and equipment: 


  • Drywall saw 
  • A utility knife 
  • A dust mask
  • A prybar – A stud finder
  • A hammer with a claw 
  • A strong magnet 
  • Masking tape
  • A drill with screwdriver bits
  • A stud finder

How to Take Off Plasterboard Sheets


1. Use the stud finder to locate utilities and areas where you need to be careful. Mark these areas with masking tape.  


2. Detach the mouldings. Depending on the scope of your project, you may need to remove skirting boards or baseboards and, window moulding and cornices, anything attached in front of the drywall sheeting.


3. Use the utility knife to cut the drywall tape along the edges of the section of drywall you wish to remove. For an entire wall, this will be in the corner and possibly the ceiling line, plus sections where individual sheets join. If you’re unsure where sections of the drywall sheet join up, go to the next step and cut drywall tape when you identify where it is.


4. Locate the nails or screws holding the drywall with the magnet. The drywall will be attached to the timber framework via nails or screws.


Use the drill and screwdriver bits to remove the screws. Use the magnet and drill to locate and remove the screws until all screws from the entire sheet or section you wish to remove are gone.


Start at a corner of the drywall, if possible. If not, create a hole in the drywall using the prybar. The goal is to make a segment of the drywall you can pry up and loosen the sheet. If the sheeting breaks, repeat the process. Continue until the entire sheet or section you wish to remove has been removed. If you’re removing a specific drywall area, use a drywall saw to cut a clean edge.


5. Take out the nails that are left in the timber structure. Use a claw hook hammer or pry bar to get rid of any nails that are left.


Conclusion


You may need to remove drywall when renovating a room, repairing damage, or gutting a house after a flood. Prepare the walls for removal and follow the few simple steps mentioned above to get the job done quickly.


If you are looking for a registered plastering company, call We Plaster & Recruit. We provide the best drywall services throughout Brisbane, Gold Coast, and Queensland areas. Get in touch with us now to request a quote. 

Why Should People Hire a Plasterer for Installing a Drywall?

Professional contractors and homeowners can both install drywall at home. However, as more people feel comfortable doing things themselves, some choose not to hire professional help as it becomes cheaper to execute the project they have in mind. But there is nothing better than leaving the work to the experts. Therefore, why should people hire a plasterer to install drywall? Here are some ideas.


1. Easier Execution


Installing drywall right can help retain the heat in a room during winter and let it escape during the summer. The process requires a certain mastery in positioning the drywall sheets, which takes a few hours to complete.


Believe it or not, it can take hours to complete a project that a professional can finish in minutes. While this may not be the case with big jobs, taking up a big job can cost a lot of time and effort. Hiring a plasterer will also save you time as they can do the work faster than you can.


2. Cost-Efficient


As mentioned earlier, a plasterer does it for a living, so the price will be lower than a drywaller who does this as a hobby. It is not rocket science, so plasterers charge a lower rate than you pay for the do-it-yourself attempt.


If you need the sheets to be completed quickly and well, it is wise to hire a professional plasterer to complete the job. Many have different rates, but hourly rates are the most common. It all depends on the demand in your area.


3. Safer Approach


When doing it yourself, you may accidentally mishandle the sheets when handling them. It can be dangerous as it could damage the walls, sheetrock, and your health. Plus, if you apply the adhesive wrong, the sheet will fall off the wall and ruin it.


You will have a safe execution by hiring a plasterer to do the job. Experienced plasterers will know how to apply the adhesive correctly. Therefore, it will stay in place long enough. Also, if the sheets you buy have drywall tape applied, you will save a lot of time. The plasterer will just use the video and then hang the drywall.


4. More Appropriate Tools


A plasterer will have the right tools for the job. Whether it is a trussing gun or a nail gun, he will have the right one. Many people hire a plasterer for something that can be done by themselves. But the right tools do not come cheap. Moulding and corner beads can be much more expensive than worth buying.

Therefore, hiring a professional plasterer can be a good investment. They will have their tools, so they will not use the ones you have. Furthermore, some workers are known to steal the tools of other workers. As a result, it is better to use what the plasterer brings.


5. Quality Work


Not all plasterers are good at their jobs. Many are incompetent and end up damaging the wall. As a result, many homeowners hire plasterers and DIY guys to complete a project. The good part is that people can choose the best option for them. Without a doubt, hiring plasterers for any drywall project you plan to do is best.


Conclusion


While many people will say that preparing the wall is the most critical part of installing drywall, that is not always the case. Many people have the frame installed and just have the drywaller come to do their job. It can be due to various reasons, but it is always better to hire a plasterer to do your job right. Therefore, hire plasterers to help you with your drywall installation.


We Plaster & Recruit offers standard plastering services in Brisbane. We also provide other services like putting up dry walls and other more. Our team is a group of experienced and skilled professionals that makes every project easy and quick. Contact the best plasterers near you on Gold Coast today through our website.