ABN: 11 641 139 568

Blog

What To Consider When Choosing Exterior Wall Cladding

Choosing suitable exterior cladding for your home can be a difficult decision, so it’s essential to understand what you are getting into. You want something that will stand up to the elements and look good, but you also want it to be affordable.

If you’re still not sure about which type of cladding is best for your home, consider these factors:

The Materials Used

There are lots of materials you can use for cladding, but they all should have similar characteristics: they should be fire-resistant and weather-resistant. If you want to use wood as an exterior wall cladding material, ensure it’s treated against rot and other conditions that could damage it over time. 

The best cladding materials should be easy to install, durable, and long-lasting. You also want the cladding to look good in your home’s design scheme, so choose something that will complement other elements of your property.

The Climate

The climate you live in will play a significant role in the type of cladding you choose because it needs to be able to withstand the weather. If you live in an area with a lot of rainfall, you’ll want to select a material that won’t rot or warp over time.

The Style of Your Home

The style of your home will also dictate the type of cladding you choose. If you want a traditional look, brick or stone might be the way to go. Metal or synthetic materials might be a better option if you’re going for a more modern look.

The Cost

Of course, you’ll also need to consider cost when choosing your exterior wall cladding. Some materials, like brick and stone, can be pretty expensive. Others, like vinyl, are more affordable. It’s best to choose one that fits your budget.

Installation Methods

The ease of installation is also something to consider when choosing your cladding. Some materials, like metal siding, can be quite challenging to install. Others, like vinyl, are much easier.

Ease Of Maintenance

You’ll also need to consider the maintenance required for the type of cladding you choose. Some materials, like brick and stone, require regular cleaning and sealing. Others, like vinyl, are virtually maintenance-free.

Durability

You will want to choose a material that is durable and will last for years to come. Some materials are more durable than others, so you will want to keep this in mind when making your decision.

Colour and texture

The colour and texture of your cladding should complement your home’s existing architecture and blend in with your neighbourhood. For example, if you live in a Victorian-style house with intricate trim, you may want to use a smooth surface like aluminium or steel. On the other hand, if you live in a ranch-style home surrounded by stucco, wood siding might look better on your house.

Conclusion

Cladding can add character to the exterior of your home, and it’s available in a variety of styles and materials. You have many options to choose from, and installing cladding to your home can give it a darker, richer appearance. But before you rush out to buy your cladding, make sure that you know what factors need to be considered and how they will affect your home in the long run.

Are you planning to install cladding soon? We Plaster & Recruit is the place to go if you’re looking for a plastering service on the Gold Coast to handle your cladding projects. It’s not just about the quality of the product but also the process. Get in touch with us today!
Through the Cracks: Taking Note of Your Plaster Walls

If you’re like most homeowners, you probably don’t think much about your plaster walls until there’s a problem. But taking the time to inspect your plaster walls on a regular basis can help you identify potential problems early on before they have a chance to cause serious damage.

That said, below are just a few indicators to watch out for when cracks begin to break through the plasters.

First of All, What Causes Plaster Cracks?

Plaster cracks typically occur in older homes as the plaster ages and settles. Plaster is a very sturdy material, but over time it can become brittle and crack under the weight of the house. These cracks are usually small and do not pose any threat to the structural integrity of the house.

As a new build or extension settles, the weight of the building can cause plaster to crack in some places. This is due to the building’s foundations slowly settling into the ground. This process usually takes 1-3 years to complete.

The humidity, temperature, and moisture levels in an environment can cause cracks to form in plaster walls. The plaster expands and contracts as the conditions fluctuate, which causes the structure of the building to swell and sink. This can result in hairline cracks that become more noticeable over time. When new plaster is applied to walls, it is normal for hairline cracks to form as the plaster dries out.

If your home is located on a busy road, you may experience some cracking due to the vibration from the traffic. However, this is usually no cause for concern. That said, you may also see cracks around your windows if you’re in a quiet spot. This is especially common with timber frames, which are not supported by a lintel.

Plaster cracks can be either cosmetic or structural. Cosmetic cracks are usually small and can be fixed with a plaster skim. Structural cracks are usually bigger and require more investigation.

The Different Types of Cracks to Look Out for on Your Plaster Walls

1. Hairline Small Cracks

Hairline cracks in vertical lines are not something you should worry about in your house. They can be caused by settling or a sudden change in weather.

2. Vertical or Horizontal Cracks

If the cracks in your home are horizontal or vertical, it may be due to the drying or shrinking of the construction materials. These types of cracks are common after new construction. These problems may not be considered dangerous.

3. Jagged Pattern Cracks

The jagged cracks in the foundation can cause structural problems if they are left untreated. These cracks can be caused by the foundation settling or by uneven settling. If you notice these cracks, it is best to call a professional builder to come and assess the problem.

4. Staircase Steps Patterned Cracks

The cracks in the floor that look like stairs can be a cause for concern if they are wide and long. This may be because the floor has settled or moved significantly. These kinds of cracks can also be caused by one side of the floor being higher than the other.

When it comes to your home, you can never be too careful. A thorough inspection from a professional builder or investigator can save you a lot of trouble down the road.

Conclusion

Overall, it is important to take note of your plaster walls and to repair any cracks as soon as possible. Cracks can be caused by a number of things, including settling, temperature changes, and humidity. If left unattended, cracks can worsen and lead to serious structural damage.

If you are looking for a company that offers plastering services on the Gold Coast, look no further than our expertise here at We Plaster & Recruit. We are a registered plastering company providing the best plastering services with operations throughout Brisbane, Gold Coast and Queensland areas. Call us today and let us tend to all the visible cracks on your plaster walls.

7 Reasons Why You Should Use a Plaster Ceiling Cornice

In any home, decorative features are essential to highlight the space’s overall style. For example, a coffee table with a few carefully chosen books and trinkets can significantly impact a living room. Of course, this also applies to the home’s exterior, arguably more important because a home’s physical appearance can improve curb appeal. A perfect example of this is the cornice.

In architecture, cornice refers to any horizontal decorative moulding that crowns a building or piece of furniture. The function of the projecting cornice of a building is to throw rainwater free of the building’s walls.  A cornice is often the most visible part of a building’s exterior, and it can significantly affect the overall look of a home. Cornices can be made from various materials, but plaster is one of the best choices.

If you’re planning to have cornices on your home’s roof, here are some reasons why you should choose plaster:

#1 – Durability

Cornices are exposed to the elements, which must be durable to withstand the weather. Plaster is solid and durable, so it’s ideal for cornices. It won’t rot, warp, or crack over time and can withstand high winds and heavy rains.

#2 – Versatility

Plaster cornices can be made in any shape or size and decorated in any way you like. You can add textured designs, paint them, or add other decorative elements.

#3 – Less Time-Consuming Installation

Cornices generally take too long when installing them. This is because they require a lot of precise measuring and cutting. Plaster cornices, on the other hand, can be quickly and easily installed without all the hassle.

#4 – Easily Restored

When cornices are made from materials such as polyurethane or glass-reinforced concrete, it can be pretty tricky to restore them when they get damaged. Plaster cornices, however, can be easily restored to their original condition with the right tools and materials.

#5 – Low Maintenance

Plaster cornices are low maintenance. You don’t have to worry about regularly cleaning your cornices as they don’t collect dust like other materials. Plus, if they do get damaged, they can be easily repaired with the right tools and materials.

#6 – Environmentally Friendly

Plaster cornices are made from natural materials, so they are environment-friendly. They don’t contain harmful chemicals or pollutants that can damage the environment. Plus, they can be recycled or reused after they have been removed from your home.

#7 – Cost-Effective

Plaster cornices are a cost-effective option for your home. They are affordable and can last for years with proper maintenance. Plus, you don’t have to worry about regularly replacing your cornices as they are durable and can withstand wear and tear.

Other Options for Cornices

Aside from plaster, there are other options to choose from when building cornices. These include:

Gypsum

Gypsum is a natural mineral that can be used to restore hardness in water. This makes it an excellent material for cornices, as it can be shaped and recycled.

Polyurethane

Polyurethane is a type of plastic that can be moulded into different shapes. It’s often used to create cornices because it is light and easy to work with.

Paper-Covered Gypsum or Plaster

Paper-covered gypsum or plaster is a cornice made from gypsum and plaster. This material is often used in historical restoration projects as it can be moulded to match the original cornice.

POP

POP is an abbreviation for Plaster of Paris. It’s a cornice made from a mixture of water and plaster. This material is easy to work with and can be moulded into different shapes.

Glass Reinforced Concrete

GRC is a cornice made from a mixture of concrete and glass fibre. This extremely strong and durable material makes it ideal for high-traffic areas.

Conclusion

Plaster is the perfect material for cornices because it’s easy to work with. Since it can be moulded into any shape, it’s ideal for creating intricate designs. All that matters is finding a reputable contractor who can create the perfect cornice for your home.

If you’re looking for plasterers in Brisbane, We Plaster & Recruit can help you! Our professional plastering contractors use high-quality materials to ensure your home’s plaster lasts long for affordable prices. Reach out today and allow us to help you!

8 Common Plastering Problems That Affect Australian Homes

There are several common plastering problems that every Australian house can face. These include cracks, holes, flaking and peeling plaster, and uneven surfaces. While some of these problems can be easily fixed, others may require the help of a professional.

Here are 8 of the most common plastering problems faced by Australian homeowners and how to fix them.

1. Cracks

Cracks in the plaster are one of the most common problems faced by homeowners. Cracks can occur due to several reasons, including settlement, thermal expansion and contraction, and even poor workmanship.

The best way to fix cracks is to use a patching compound or plaster repair kit. These can be easily purchased from your local hardware store.

2. Flaking

If your plaster is flaking, it means that the surface is not properly adhered to the wall. This can be caused by several factors, including poor workmanship, humidity, and even the quality of the plaster itself.

The best way to fix flaking plaster is to remove the loose plaster and then reapply a new layer. You may also need to use a bonding agent to ensure that the new layer adheres properly.

3. Bubbling

Bubbling occurs when air pockets form between the plaster and the wall. This can be caused by several factors, including poor workmanship, humidity, and even the quality of the plaster itself.

The best way to fix bubbling plaster is to puncture the air pockets with a sharp object and then reapply a new layer of plaster. You may also need to use a bonding agent to ensure that the new layer adheres properly.

4. Peeling

Peeling plaster is another common problem faced by homeowners. Peeling can be caused by a number of factors, including poor workmanship, humidity, and even the quality of the plaster itself.

The best way to fix peeling plaster is to remove the loose plaster and then reapply a new layer.

5. Crumbling

If your plaster is crumbling, it means that the surface is not properly adhered to the wall. This can be caused by a number of factors, including poor workmanship, humidity, and even the quality of the plaster itself.

The best way to fix crumbling plaster is to remove the loose plaster and then reapply a new layer.

6. Uneven Surfaces

If your plastering job has been done by an inexperienced person, then the surface of your wall might not be even. Although it’s not a big problem, it can be quite annoying to look at. To fix this, you can use a sander to even out the surface. If the unevenness is not too bad, then you can also use a putty knife to even it out.

7. Water Damages 

Water damage is another common plastering problem faced by homeowners. Water damage can be caused by several factors, including leaks in the roof, leaks in the walls, or even flooding. If you have water damage in your home, the best way to fix it is to repair the leaks and then re-plaster the affected areas. This will ensure that the new plaster will be able to withstand the effects of water damage.

8. Cracks

Cracks are another common plastering problem faced by homeowners. Cracks can be caused by several factors, including the settling of the house, the expansion of the house, or even the contraction of the house. If you have cracks in your home, the best way to fix them is to re-plaster the affected areas. This will ensure that the new plaster will be able to fill in the existing cracks.

Conclusion

There are a number of plastering problems that every Australian house face. The most common plastering problems include cracks in the walls, peeling paint, and holes in the plaster. These problems can be caused by a number of factors, including weather, insects, and poor workmanship. However, there are a number of ways to fix these problems, and most of them are relatively simple and inexpensive.

Are you looking for plastering companies on the Gold Coast? Look no further! We Plaster & Recruit is a registered plastering company providing the best plastering services with operations throughout Brisbane, Gold Coast and Queensland areas. We are fully licensed and insured. We believe in quality work to breathe in new life to the interiors while also giving you value for your money. Over the years, We Plaster & Recruit have mastered and worked on all sorts of plastering contracts. We follow strict protocols and guidelines to make our work stand out. Get in touch with our team today!

Going for a Drywall Cover over Taking Down a Popcorn Ceiling

Would you want to fix or remove a popcorn ceiling? It’s important to remember that removing a popcorn ceiling is a really unpleasant job. Also, repairing a hole just means doing that. 

Instead, you ought to think about just adding a fresh coat of drywall over the entire unsightly mess. It’s most likely the simplest technique to achieve the finest outcomes.

Dry Wall for Your Ceiling

The task of replacing an old ceiling with new drywall is difficult, time-consuming, and messy. But occasionally, it’s the best course of action. 

Experienced remodelers agreed on one thing: Sometimes, hiding an old ceiling will ultimately save time, money, and hassles.

Cutting holes in the ceiling without having to make complicated repairs later is one of the finest things about a ceiling cover-up project. 

Therefore, now is the ideal time to run networking connections, instal a ceiling fan, or add or change light fixtures. You can even repair floor creaks or run new plumbing for a future bathroom makeover if there is living space above the ceiling. 

The details that demonstrate how drywall can answer your problem are the subject of the following sections.

Drywall Damage

The ceiling in this article had a flaking texture, stains, and holes, so it was really quicker and simpler to cover it all with fresh drywall than to try to fix it. Repairing your holes or stains usually makes more sense if you only have a few of them.

Coniferous Ceiling

There are a few choices available if you have a strongly textured ceiling but simply don’t like the way it looks. The most typical method for removing unpainted texture is to wet it with a spray bottle and scrape off the softer material. 

That method of removing the popcorn ceiling causes a huge mess and almost invariably necessitates repairs.

Some professionals skim-coat the entire ceiling with joint compound after scraping the painted texture as best they can. Skim coating requires some experience, and scraping dried texture is a messy, dusty endeavour. 

The texture of your home may also include asbestos, which can seriously harm your lungs if it was built before 1979. Therefore, it needs to be tested before being removed. 

As long as you properly adhere to safe techniques, you can remove asbestos-containing material by yourself. Covering a ceiling is frequently simpler than removing texturing because of all of these factors.

Shattered Plaster

Repairing the short, tight cracks in a plaster and lath ceiling is probably better than covering the ceiling. But making long-lasting repairs is challenging if the ceiling is covered in cracks or if the plaster next to the fissures feels flimsy to the touch. 

Even after thorough repairs, plaster cracks frequently reappear. According to some professionals, the easiest way to ensure they won’t have to return and fix the ceiling again and again is to cover plaster ceilings routinely. 

Before applying the ceiling covering, remove any loose or sagging plaster.

Conclusion

You want to be sure you receive the greatest value for your money because remodelling your house is a significant financial commitment. Going with a drywall cover rather than removing a popcorn ceiling is one way to save money. 

A drywall cover is a great way to update your ceiling without having to do a lot of work. It is a simple option that can help you save money over time.

We Plaster & Recruit delivers high-quality drywall in Brisbane. We’re a registered plastering company that provides the best plastering services with operations throughout Brisbane, Gold Coast, and Queensland. Call us now to breathe in new life to your interiors!

How You Can Find the Best Plasterer in Your Area

Because you don’t need one on a regular basis, finding a good plasterer can be challenging. Don’t worry, though. Whether you need to plaster your whole home or just a few areas, this can help you find a professional plasterer who can deliver the results you want from the job:

What to Look for in a Plasterer

There are key things to look for when hiring a plasterer. 

Experience

You’ll want to hire a plasterer with a good amount of experience. This way, you’d be confident that they do know what they’re doing and will be able to do a great job.

Guarantee

Make sure the plasterer offers a guarantee on their work. This will give you assurance in case anything goes wrong.

Insurance

Make sure the plasterer has insurance, so you won’t have to worry about anything if they damage your property while working.

How to Find the Best Plasterer

There are many factors for consideration when trying to find the best plasterer for your needs. You’ll want to find someone who has a good reputation. You’ll also want to ensure that they’re affordable and can do the job you need.

Here are tips to help you find the best plasterer for your needs:

  1. Ask around. Talk to your friends, family, or neighbours to see if they have any recommendations. If you know someone who has recently had work done, ask who they used and whether they were happy with the results.
  2. Do your research. Once you have some names, take some time to research each one. Look for online reviews and testimonials. See if you can find information on their experience and qualifications.
  3. Get quotes. Once you’ve narrowed your list, contact each plasterer and request a quote. Be sure to explain what you need done and ask about any discounts that might be available.
  4. Compare prices and services. When you receive the quotes, compare the prices and services offered. Make sure you’re getting what you need at a price you’re comfortable with.
  5. Meet the Plasterer. Before you decide, you might want to meet with the professional who will work on your home first. This will allow you to see if you’re comfortable having them in your house. You’ll also have the opportunity to ask about anything you need to know, including their schedule and availability, how you should prepare your home for the plastering, and more.
  6. Make your decision. Once you’ve compared the quotes and services, it’s time to make your decision. Choose the plasterer you feel most comfortable with and who you believe will do the best job.

Conclusion

Finding the right plasterer for your home should not be a problem as long as you know what to look for, such as their experience, guarantee, and whether they’re insured or not. Know about their pricing and ask for references, too, if possible. Of course, you should also make a point to meet the pro who will do the job so you can ask any questions you might have. By keeping these factors in mind, you can be sure to find a plasterer that will do a great job on your home.

We Plaster & Recruit is a licensed and insured company that offers the services of experienced plasterers in Brisbane and other areas. Our professional plasterers are trained to provide the highest-quality plastering service you can get. Contact us to get a quote for your project!

What Plastering Is and How It Works: A Step-by-Step Guide

When it comes to plastering, there is definitely an art to it. Getting the perfect finish takes time, patience, and attention to detail. There are no shortcuts when it comes to plastering, so it’s important to take your time and do it right.

Getting a smooth finish with your plastering is easier than you might think – and it all comes down to technique. So, if you want to know how to plaster a wall and get a smooth finish, just follow these simple steps. 

What is Plastering?

Plastering is the process of applying a thin, smooth layer of material to a surface. It is often used to give walls and ceilings a smooth, finished look. Plaster can be made from a variety of materials, but the most common type is gypsum plaster.

How to Apply Plaster

Stage 1: Apply the First Coat

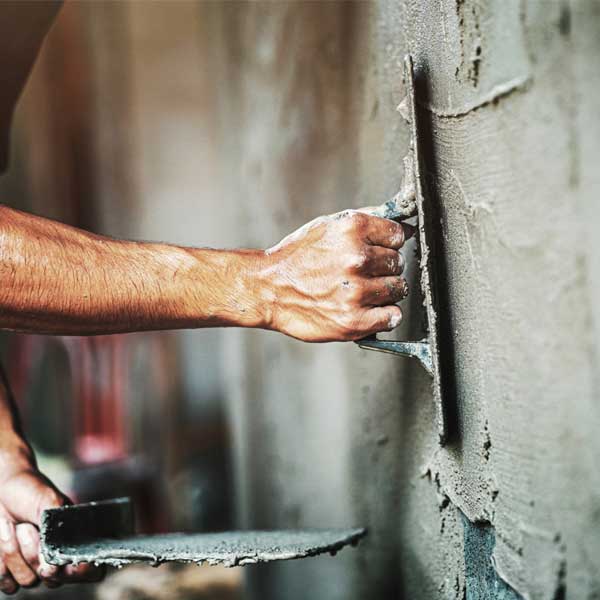
Applying your first coat of plaster should be done at an angle, with the leading edge of the trowel away from the wall. 

You should then gradually flatten it to the wall as you go. It is more important to try and get a flat, even coat with no bulges. Any trowel marks or ridges will come out later.

Stage 2: Firming Up the Plaster

After you have applied the first coat, you need to firm it up. This is done by running the trowel over the surface at a low angle, perpendicular to the previous strokes.

Do not press too hard, or you will damage the plaster. Just firm it up so that it is no longer tacky.

Stage 3: Apply the Second Coat

After the first coat is firmed up, apply the second coat. This coat should be about as thick as the first coat.

You can smooth it out with the trowel, but do not press too hard.

Let the plaster dry for about 24 hours before moving on to the next stage.

Stage 4: Remove Any Holes

This is the stage where you can go back and fill in any holes that may have formed during the plastering process. Just use your plaster mix to fill in the holes, and then smooth it out with the trowel.

Apply pressure to the trowel as you run it over the wall at a 10-15mm angle to avoid scraping or dragging. Some ridges may form, but don’t worry; these can be removed in the next step. As you apply the plaster, look closely for holes. If some holes aren’t filling, apply more plaster to the hole and flatten it.

Stage 5: Smoothing Down Ridges

Now that you’ve removed any holes, it’s time to smooth down any ridges. You may have gotten ridges when you filled the holes, or when you smoothed the plaster to the wall. To get rid of them, apply pressure to the trowel as you did in the previous step. If any plaster cracks, apply more plaster to the crack and smooth it out.

Conclusion

The process of plastering can take a few hours to a few days, depending on the size of the wall and your plastering experience. If you’re not comfortable doing this work yourself, you can always hire a professional. 

We Plaster & Recruit can help you make your plastering much easier. We provide Bunnings plaster in Brisbane to keep your walls smooth. Get in touch with us today to learn more.

5 Important Reasons to Avoid Do-it-Yourself Plastering

The application of plaster serves as a shield for your walls, preventing damage from a variety of potential threats. Like all other construction projects, it must be done correctly to use its potential benefits.

Plastering is an activity that requires a significant amount of technical knowledge despite its apparent ease. It is work that can only be done effectively by someone with prior training. When you screw up, you are responsible for dealing with the fallout of your actions.

If you’re not convinced, examine these five crucial reasons why you should not DIY the plastering of any project yourself:

1. Plastering Is a Skilled Trade 

Plastering is not something you can do yourself without any experience or training. Sure, it might look easy enough, but that is what the professionals make it look like. If you want to get good results, don’t try to do this yourself.

A good plasterer has experience and is capable of doing an excellent job that can last for a very long time. They have the tools and materials needed to make your walls look amazing – just ask them. You wouldn’t believe how many people attempt to plaster their own walls only to end up with a mess and have to call in a professional anyway in the end.

2. Plastering Is Hard Work

Plastering is hard work and requires a lot of strength and stamina. If you are not physically fit, you will not be able to do a good job. It involves working with sharp tools and heavy materials. You could easily cut yourself or drop something on your foot if you are not careful.

3. You Could Accidentally Damage Your Walls

If you’re thinking about tackling a plastering project yourself, you should know there’s a risk of accidentally damaging your walls. Plastering is a delicate process; even a tiny mistake can cause big problems.

That’s why it’s always best to leave plastering to the professionals. They have the experience and the expertise to get the job done right, and they can help you avoid costly mistakes.

4. You Could End up With an Uneven Finish

Plastering is all about getting the right consistency and thickness of the plaster so that it will adhere to the wall and create a smooth, even finish. If you don’t get the plaster right, you’ll end up with an uneven finish that will be difficult to fix.

5. It’s a Time-consuming Process

When it comes to plastering, it’s a time-consuming process. It’s not something that you should try to do yourself unless you’re experienced and have the proper tools. Otherwise, you could end up wasting a lot of time and materials.

Plastering is also a messy job, and you may not want to deal with the mess and cleanup. So hiring a professional is the best way to be sure the job is done right.

Conclusion

It is generally not advisable to attempt to plaster your walls yourself. Plastering is a skill that requires training, experience and a steady hand. Even minor imperfections in the plaster can ruin the look of your walls. If you are not confident in your ability to do a good job, it is best to hire a professional.

Are you in need of a plastering service near Brisbane? Check out We Plaster and Recruit! Put your trust in the knowledgeable plaster pros at our company whenever you need a plaster. We have assembled a skilled group of experienced individuals to meet your goals. Work with us today!

Best Tips on How to Properly Take Care of Your Cornice

A cornice is an architectural element that provides decorative or protective finishes to the eaves and/or edges of a building. They are often used on the exterior of a building but can also be used on the interior to create a decorative finish. Cornices can be made from various materials, including wood, stone, plaster, metal and even plastic.

How to Take Care of Your Cornice

If you have a cornice in your home, it is important to take care of it to keep it looking its best and to prevent it from becoming damaged. Here are a few tips for taking care of your cornice:

1. Dust Regularly

Cornices are a beautiful and elegant addition to any room, but they can also be a bit of a dust magnet. To keep your cornices looking their best, it’s important to dust them regularly with a soft, dry cloth. Avoid using abrasive cleaners or brushes, as these can damage the cornice.

2. Protect from Sunlight

Unfortunately, cornices can be susceptible to damage from the sun. Sunlight can fade or damage cornices, so it’s important to protect them from direct sunlight whenever possible. Use curtains or blinds to shield your cornices from the sun’s rays.

If you need to expose your cornices to sunlight, be sure to do so gradually. Sudden exposure to sunlight can cause cornices to warp or crack. And be sure to inspect your cornices regularly for any signs of damage.

3. Avoid Moisture

A cornice is a decorative element often used to add architectural interest to a room. They are typically made of wood or plaster and can be either simple or ornate in design. Cornices can be damaged by moisture, so it’s important to avoid hanging wet laundry on them and to wipe up any spills quickly. When choosing a cornice for your home, it’s important to consider the overall style of the room and the materials that will best complement it.

4. Repair Cracks Promptly

Cracks in cornices can worsen over time, so it’s important to repair them as soon as possible. There are a few different ways to repair cracks in cornices, depending on the severity of the damage. For small cracks, you can use a plaster or wood filler to fill in the crack and then paint or varnish over the repair. For more serious damage, you may need to replace the entire cornice.

5. Add Support If Needed

If your cornice starts to sag or crack, it may need additional support. You can add support by screwing brackets into the wall or by installing a cornice box.

When installing a cornice box, it is important to ensure that the box is the correct size for your window or door. The box should be slightly larger than the opening so it can be properly secured. You will also need to choose a cornice box that is compatible with the material of your cornice. For example, you must choose a wood cornice box if your cornice is made from wood.

Conclusion

It is important to take care of your cornice to maintain the integrity of your home’s exterior. Cornices are susceptible to weather damage, so it is important to inspect them regularly and make repairs as needed. You can avoid costly repairs by regularly cleaning your cornice and keeping it in good repair.

If you are interested in getting a gyprock cornice in Brisbane, you can contact us at We Plaster & Recruit. We are a registered plastering company providing the best plastering services. Hire us and keep those cornices maintained!

What You Need to Know About Plastering and Patching Costs

If you’re thinking of doing some plastering or patching work around your home, you might be wondering how much it will cost. Here in Australia, the cost of plastering and patching can vary depending on a few different factors.

Type of Plaster

The most common type of plaster used in Australia is cement render. Cement render is a mix of cement, sand and water and is applied to walls in a thin layer. Once dry, the cement render is very hard and durable, making it ideal for both internal and external use. Cement render is also relatively cheap, costing around $10 to $15 per square metre.

Another popular type of plaster is clay render. Like cement render, clay render is a mix of clay, sand and water. However, clay render is much more flexible than cement render, making it less likely to crack. Clay render is more expensive than cement render, costing around $20 to $25 per square metre. However, the extra cost of clay render is often worth it for the improved finish and increased durability.

If you need to patch up a small area of plaster, then ready-mixed plaster is a good option. Ready-mixed plaster is simply a mix of plaster and water and can be applied directly to walls with a putty knife. Ready-mixed plaster is very cheap, costing around $5 to $10 for a small tub.

The Complexity of the Work

When it comes to home improvement projects, many homeowners are quick to assume that the costs will be relatively low. After all, how much could it possibly cost to patch a hole in the wall or to replaster a section of the house? However, the reality is that plastering and patching costs in Australia can be quite high, depending on the complexity of the work involved.

For example, a simple repair job such as patching a small hole in the wall may only cost a few hundred dollars. However, if the hole is large or if the wall is in need of extensive repair, the costs can quickly skyrocket. In fact, it is not uncommon for plastering and patching projects to cost several thousand dollars.

Region of the Country

The region of the country you live in will have a big impact on the overall cost. In general, the cost of plastering and patching will be higher in the more urbanised areas of Australia, such as Sydney, Melbourne and Brisbane. This is due to the higher cost of living in these areas, as well as the higher demand for these services.

If you live in a more rural area, you may be able to find a cheaper quote for these services. This is because there is typically less demand in these areas, so plasterers and patching companies may be willing to negotiate on price.

When getting quotes for plastering and patching, be sure to ask about any discounts that may be available. Many companies offer discounts for seniors, students and those who book in advance.

Final Thoughts

It is important to know the cost of plastering and patching in Australia before starting any construction project. The cost of plastering and patching can vary depending on the size and complexity of the project and the materials used. Overall, it is advisable to get quotes from several different companies before deciding on which one to use for your plastering and patching needs.

Get a quality plastering job for your home from We Plaster & Recruit. We are a plastering service in Brisbane that have a talented team of professionals ready to address your needs. It doesn’t matter how big or how small the job might be; we are more than qualified to handle the work for you. Request a quote now!