ABN: 11 641 139 568

Blog

Hanging Pictures on Plaster Walls: Best Ways to Do It

Hanging pictures on a plaster wall can be tricky, but it can be easy with a few tips and tricks! Plaster walls are different from drywall in that they are made of a more rigid material, so it is essential to use the proper tools and techniques when hanging pictures. With patience and the right supplies, you can easily decorate your plaster walls with pictures, paintings, and other wall hangings!


The following are the best ways to hang pictures on a plaster wall.


1. With the Use of Double-Sided Adhesive Tape


When hanging pictures on a plaster wall, many people think they need to use nails or some other type of hardware. However, there is an easier way to do it that does not require any tools at all. All you need is some double-sided adhesive tape.


This method is straightforward. Put a strip of tape on the back of your picture frame and press it onto the wall. The tape will hold the frame in place just like nails would.


One advantage of using double-sided adhesive tape is that it will not damage your walls like nails. Plus, it is much easier to remove pictures that are taped up than it is to remove them from nails. If you ever need to move your photos around, peel off the tape and stick them somewhere else.


2. Using the Plasterboard Anchors


Plasterboard anchors are easy to use and allow you to create various looks.


To use plasterboard anchors:


  1. Mark the spot on the wall where you want to hang the picture.
  2. Drill a hole into the plasterboard in the marked area.
  3. Insert the plasterboard anchor into the hole and screw it in place.
  4. Hang your photo from the anchor.

With some grit and creativity, you can use plasterboard anchors to create a one-of-a-kind look for your home.


3. Using Plastic Wall Plugs


Hanging pictures on a plaster wall can be tricky, but with the right tools and a little know-how, it’s pretty easy! All you need are plastic wall plugs and a few simple household items.


First, start by finding the studs in your plaster wall. Do this by lightly tapping on the wall until you hear a solid sound. Once you’ve found the studs, mark their location with a pencil.


Next, grab your plastic wall plugs and screw them into the studs. Be sure to screw them in tightly, so they’re secure.


Finally, use some picture wire or string to hang your pictures from the wall plugs. That’s it! You’re now ready to enjoy your newly decorated wall.


4. Using Hooks and an Adhesive Hanger


If you’re looking for a way to hang pictures on a plaster wall without damaging the wall, using hooks and an adhesive hanger are great options. Adhesive hangers are easy to use and come in various sizes to find one perfect for your picture. 


Start by cleaning the wall area where you will attach the adhesive hanger. Make sure the surface is free of dust and debris. Next, apply the adhesive hanger to the back of your picture frame.


Once the adhesive hanger is in place, press it firmly against the wall. Hold the picture frame in place for 30 seconds to allow the adhesive to set.


Conclusion


Hanging pictures on a plaster wall is not as difficult as it may seem. With the proper tools and supplies, anyone can do it. The most important thing is to be careful and take your time. With patience and effort, you can have beautiful, professional-looking results.


We Plaster & Recruit is a registered plastering company that offers the best plaster supplies in Brisbane. We believe in doing quality work to boost the interiors while giving you good value for your money. Request a quote today!
Heard about Industrial Interior Design? Here’s What It Is

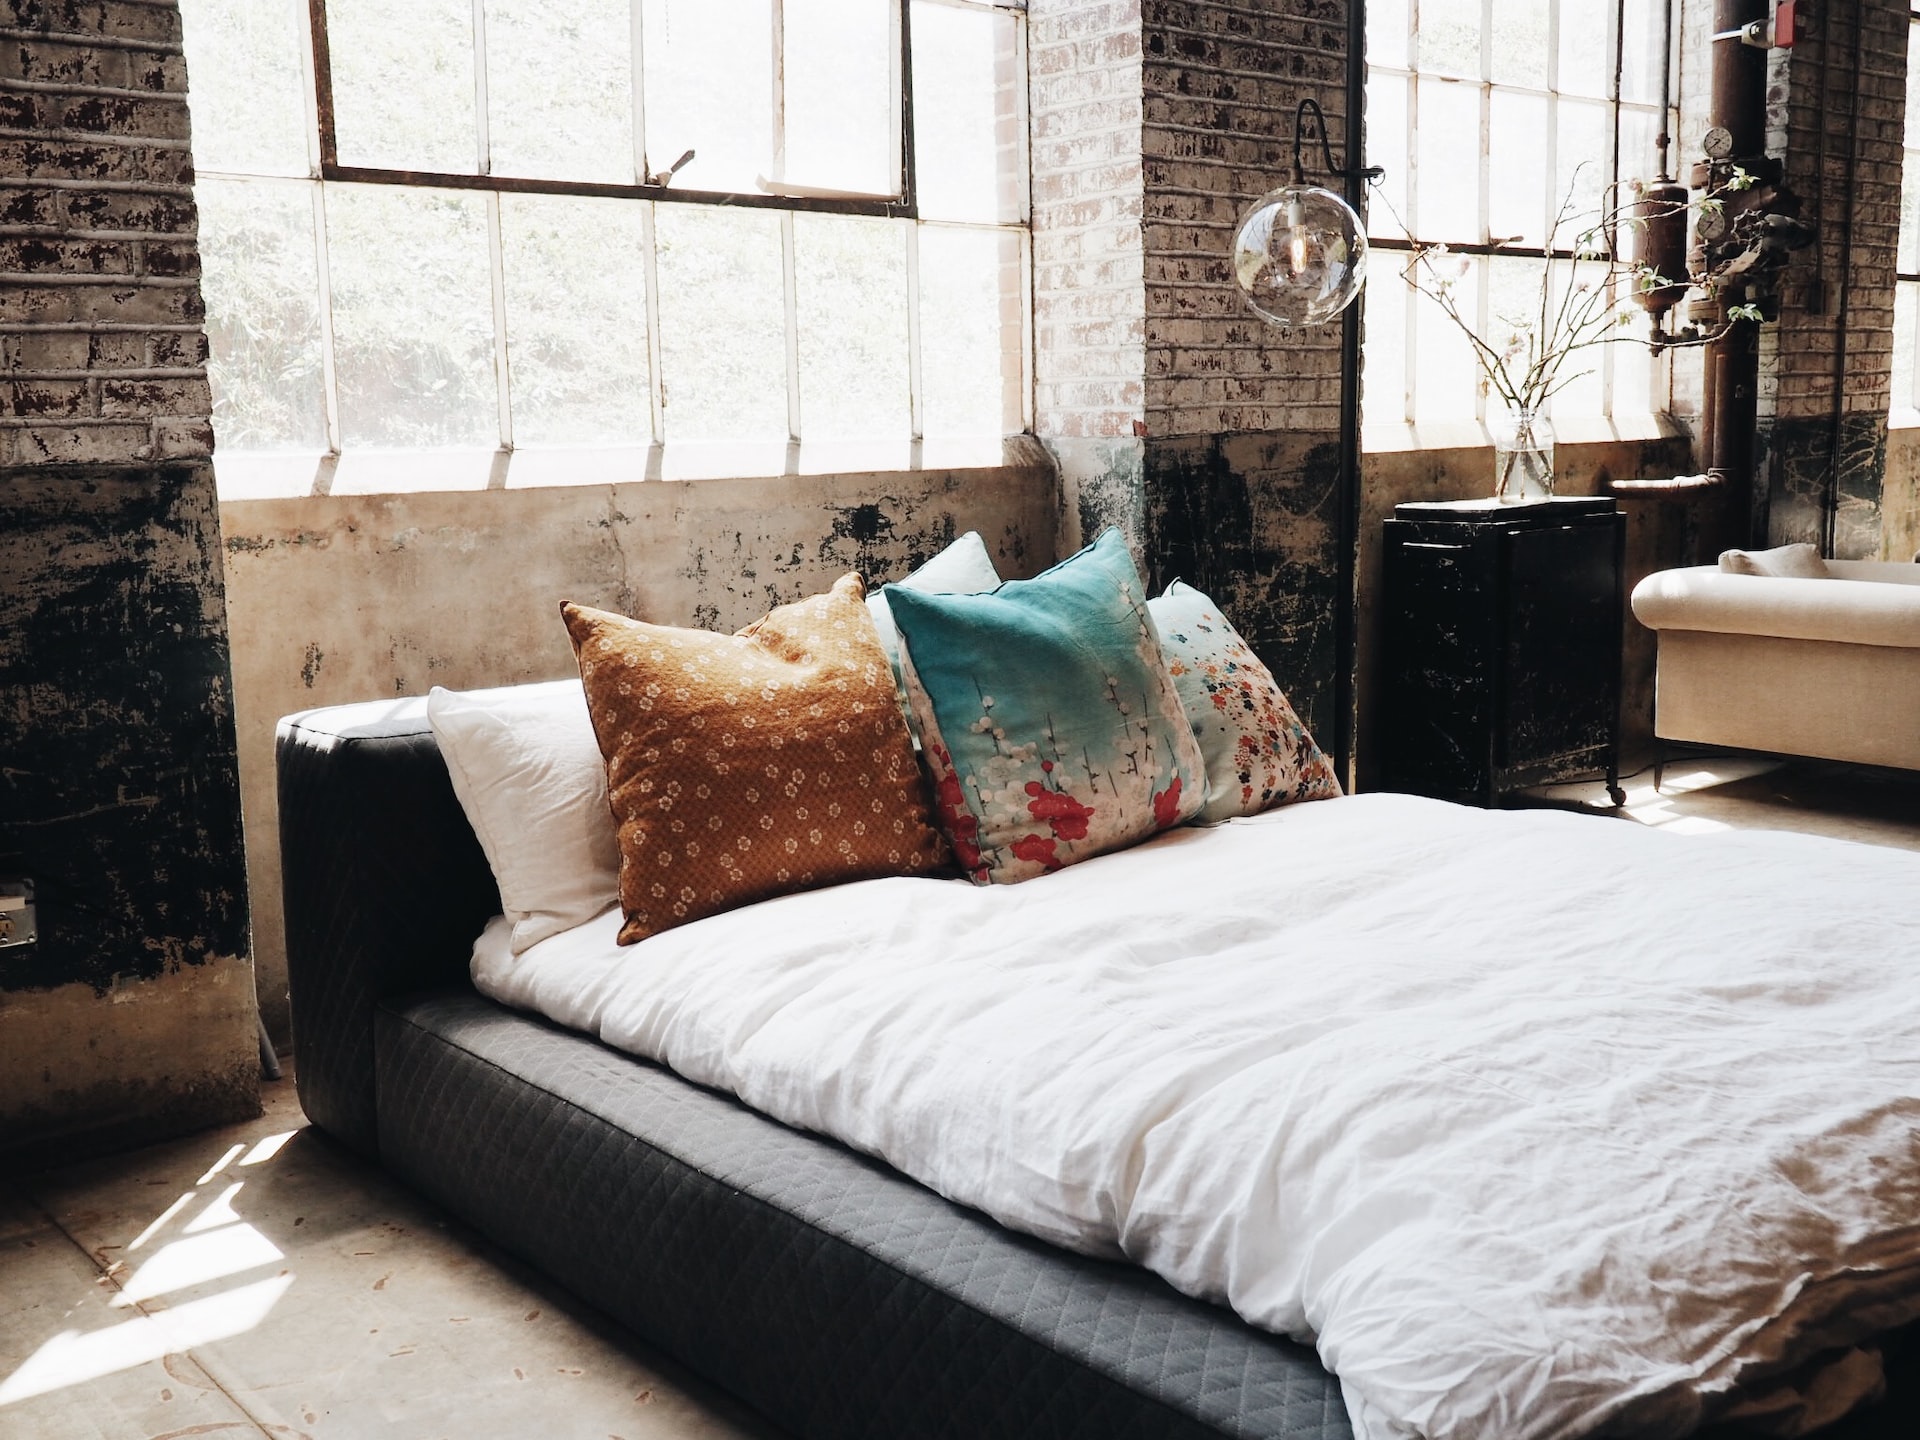
Industrial interior design is marked by simple utilitarianism, combining raw and rough materials with modern elements. This design style allows designers to use natural, recycled and repurposed materials while maintaining a sleek and modern look. All this began in the 70s when many older factories and warehouses were closing down and converted into living spaces. Rather than completely covering up the industrial look of these buildings, designers began decorating around them.


Thus, it emphasises the raw, unfinished look of industrial spaces. It often features exposed brick, ductwork, other structural elements, and natural materials like wood and metal.


Industrial interior design is marked by exposed materials and unfinished looks such as cement and plastering, perfect for those who appreciate raw and unfinished aesthetics that are visually appealing but also low-maintenance and low-cost. It is a trend that makes them into features rather than flaws. 


The aesthetic is often used in lofts and converted warehouses, where the industrial look of the building is part of its charm, emphasising a building’s history and using recycled materials like scrap wood while also creating a relaxed atmosphere.


Let’s explore this design trend deeper with its distinct characteristics:


  • Exposed areas: Industrial interior design focuses on leaving certain elements exposed that are normally concealed. This includes brickwork, pipes, ducts, wood, metal, plastering, and concrete surfaces.

  • Instinctive finishes and neutral colours: Designers who subscribe to the industrial style use natural finishes and neutral tones instead of brightly painted walls or patterned tiles. They favour grey concrete, natural unfinished wood, and sleek metallic details. These natural finishes and neutral tones in a decorating scheme give the space a warm and inviting feeling that is perfect for entertaining or relaxing.

  • Natural open spaces: Industrial-style interiors tend to be minimalistic, focusing on function over form. This often results in open plan living areas, as having fewer walls and dividers creates the illusion of more space. This style is about making the most of your space and ensuring that everything has a purpose, even if it’s an unpainted cement wall or plastering.

  • Application of old, reusable components: Industrial interiors typically feature vintage-inspired pieces and antique light fixtures. However, some designers also use upcycled furniture and materials to give the space more character. For example, a pallet sofa or picture frame made from salvaged wood would be perfect for an industrial interior.

Creating This Look for Your Space


Designing an interior with an industrial flair requires thinking outside the box and being creative with your space. Use existing building features, such as exposed brick walls or metal beams, and work them into your design. Incorporate industrial lighting fixtures and furniture to complete the look.


To achieve this aesthetic in your home, try to incorporate some exposed brickwork or refinish an old hardwood floor instead of replacing it. You can also choose vintage lighting in cool metallic colours, functional furnishings, and upcycled accessories in neutral tones.


The industrial style combines raw, unfinished elements with sleek, modern furnishings. Think exposed brick walls, metal beams and ductwork, concrete floors and surfaces, and large windows. It’s not exactly sleek, but not also on the button regarding a utilitarian space. When done well, it can be a stylish and unique look for your home.


We Plaster & Recruit for Your Industrial Interior Design Project


Simplify this project by hiring We Plaster & Recruit today! We’re the team for the job regarding redesigning or plastering in the Gold Coast. We look for qualified professionals to work on their expertise related to the project, so you’re certain the job’s done on time, within budget, and with the quality you want. Request your quote from our website today!

Smooth Details: Some Helpful Tips When Hiring a Plasterer

Plastering is not a simple task; if you are not careful, you will end up with a lot of mess. That said, you need to be sure that the plasterer you hire knows what they are doing and is experienced in their field. In such a case, below are some tips that can help you choose the right plasterer for your needs.


1. Ask about Their Qualifications


How long has your plasterer been in business? Your plasterer should be able to show you their credentials. Plasterers need insurance if they have an accident while working in your home.


2. Ask If They Are Insured and Has Public Liability Insurance


When looking for a contractor, always ask to see their public liability insurance certificate. This will ensure that they are registered with the proper trades board.


3. Ask If Their Equipment Is up to Date


If you’re looking for a professional plasterer, it’s essential to ask about their equipment. Outdated equipment can lead to subpar results, so you’ll want to ensure that your plasterer only uses the latest and greatest tools.


4. Ask to See Examples of Their Work in the Past


Before starting any plastering work, it’s important to check with your local council or building department to make sure that their recent work has been certified. This will help ensure that the work is up to code and will meet your expectations.


5. Ask for at Least Three Quotes for Their Services


When getting quotes for plastering, be sure to ask how long the job will take, if there is a warranty on the work, and what kind of materials will be used. These factors can affect the price, so getting all the information upfront is essential. Once you’ve decided on a plastering contractor, get a written contract outlining the scope of work and payment schedule.


6. Observe How They Work


The quality of a plastering job is judged by how smooth, even, and consistent the finish is. Plastering should be applied neatly and evenly to all surfaces, with no visible imperfections. The corners should be especially well finished.


7. Ask Them to Prepare a Quotation


Get a written estimate from your contractor, so you know exactly how much the project will cost. Review the estimate with your contractor to make sure there are no misunderstandings. This will help ensure a smooth project from start to finish.


8. Look for a Plasterer Who Will Not Cut Corners


It’s important that your plasterer has the time they need to do a good job – rushing them will only lead to poorer quality work. Make sure there are no time or money pressures that could force them to hurry.


9. Look for Plasterers Who Will Finish the Job Correctly


Many plasterers cut corners on jobs because they feel cheated on the price. This can lead to substandard work that may need to be redone later, or worse, something could go wrong with the plaster. To avoid this, it is essential to find a plasterer who is committed to a fair price range.


10. Check If the Plasterer’s Personality Is Right for the Job


The psychological aspect of hiring a contractor is just as important as the skillset they possess. A contractor who is great with customer service and has a pleasant demeanour can make all the difference in feeling comfortable with who you’ve hired. The best plasterers are often great at social interactions, making for an overall positive experience.


Conclusion


If you are thinking about hiring a plasterer to help improve the look of your home, there are a few things you should keep in mind. First, be sure to ask for referrals from friends or family members who have recently had work done. Second, take the time to meet with a few different plasterers to get a sense of their work and personality. Finally, be sure to ask for a written estimate before any work is begun. By following these simple tips, you can be sure to find the right plasterer for your needs.


If you are looking for experienced painters and plasterers on the Gold Coast, look no further than our experts here at We Plaster & Recruit. We are a registered plastering company providing the best plastering services with operations throughout Brisbane, Gold Coast and Queensland areas. Call us today and let us tend to your plaster damages at home in no time!

Construction Materials: How Drywall Dominated Construction

Being a homeowner is beneficial because you have a place for yourself and your family. However, it’s also a responsibility because a house is an investment you must protect from various problems, such as mould and mildew. There are many ways of doing this, but there’s no better way than installing drywall.


Drywall is a material made of gypsum plaster pressed between two thick sheets of paper. It’s generally used to create walls and ceilings, but it’s also used for other purposes, such as soundproofing or fireproofing. It’s an effective way to protect your home from mould and mildew because it doesn’t absorb moisture, preventing mould and mildew growth. However, few know how drywall came to be, so we’ll discuss the details in this article.


When Drywall Did Not Exist (Yet)


Before drywall was a thing, lath and plaster walls were once the norm in home construction. This process involves nailing thin strips of wood, or lath, to the wooden structure of a house. The lath then serves as a substrate for skilled tradespeople to apply plaster.


This process is time-consuming, but it results in strong and durable walls. Plaster walls are also very effective at insulating a home, which can save on energy costs. However, extra care must be done because plaster can crack over time, so you must monitor the condition of your walls and have any cracks repaired promptly.


Companies Start to Experiment


As time went by, many companies and individuals started experimenting with various methods of producing stiff, prefabricated plasterboards around the late 19th century. The Sackett Plaster Board company developed the first modern drywall called SackettBoard. It was made of alternating layers of plaster and wool felt paper. The United States Gypsum Corporation eventually bought out the Sackett operation and developed the product further. The product was introduced to the market as “Sheetrock.” It featured a layer of compressed gypsum powder between a layer of paper on either side.


Drywall is a construction material used to create walls and ceilings. It is made of panels of gypsum plaster that are pressed between two thick sheets of paper. Drywall is much faster to install than traditional lath and plaster and offers good fire resistance and strength. The material also made it possible for construction to keep going, unlike plaster, where you must wait for it to dry first. The only part of the plastering that must be done by hand was covering the joints between the boards. Quick and easy techniques were developed to make this process faster.


The Drawbacks of Drywall


While drywall is highly effective, it’s not without its faults. For one, drywall can still be susceptible to moisture damage, especially if there’s too much moisture. In turn, this can lead to mould or mildew growth. It’s also possible for drywall to sustain damage from termites and other pests.


The Future of Drywall


Drywall has been around for over a century and is still one of the most popular construction materials. It’s affordable, easy to install, and offers good fire resistance and strength. However, some drawbacks to drywall have led to the development of alternative materials. These materials include:


  • Paperless drywall – As the name suggests, this type of drywall is made without paper, making it more resistant to mould and mildew.
  • Green drywall – Green drywall is made with recycled materials and is more environmentally friendly than traditional drywall.
  • Soundproof drywall – Designed to reduce noise levels in a room.
  • Moisture-resistant drywall – treated to resist moisture and is often used in bathrooms and kitchens.

Conclusion


Drywall is a versatile material that can be used for various purposes. One must know the different types of drywall available and how they can be used to create the perfect space for your needs. When you do, you can rest assured that you have made the right choice for your home improvement project.

If you’re looking for drywall in Brisbane, We Plaster & Recruit can help you! Our professional plasterers can handle the job, and we also provide other services such as painting and cladding for residential and commercial buildings. Simply go to our website to request a quote!

What Do Plasterers Do and How Do I Hire the Right One?

A plasterer is a skilled tradesperson who applies plaster to walls and ceilings in order to create a smooth, even surface. Plastering is a centuries-old trade that is still very much in demand today.

That being said, if you’re looking to have plastering work done, one thing you might want to know first is what a plasterer can actually do for you, along with how to work with the right professional. Well, plasters do a lot of things, actually, and there are many considerations to make to work with the right one!

Today, let’s talk about what a plasterer does and how you can hire the right one for the job:

What Does a Plasterer Do?

A plasterer is a skilled tradesperson who applies plaster to walls and ceilings in order to create a smooth, even surface. Plastering is a centuries-old trade that is still very much in demand today.

Plasterers generally work on two types of surfaces: drywall and lath. Drywall is a type of wallboard that is made from gypsum and is used in the construction of most modern homes and buildings. Lath, on the other hand, is a much older construction material that was once common in homes and buildings. It is made from strips of wood or metal that are placed horizontally and vertically on a wall or ceiling in order to provide a surface for the plaster to adhere to.

How Do I Hire the Right Plasterer?

There are a few key things to consider when hiring a plasterer to ensure you get the best possible results for your home or business. Here are four key considerations to make:

1. Experience and Qualifications

When looking for a plasterer, it’s important to consider their level of experience and qualifications. You’ll want to hire someone who has plenty of experience in the trade and who holds the relevant qualifications. This will ensure they’re able to carry out the work to a high standard.

2. Cost

Of course, the cost is always a consideration when hiring any tradesperson. Get a few quotes from different plasterers to get an idea of average prices in your area. Remember, the cheapest option isn’t necessarily the best option. You’ll want to balance cost with the other factors on this list.

3. References

When you’ve shortlisted a few potential plasterers, ask for references from past clients. This will give you an idea of the quality of their work and whether they’re easy to work with.

4. Insurance

Make sure the plasterer you hire has the relevant insurance in place. This will protect you in case anything goes wrong during the course of the work.

By keeping these four considerations in mind, you’ll be sure to hire the right plasterer for the job.

Conclusion

All in all, a plasterer can do many plastering-related tasks for you, and knowing how challenging plastering can be, having a professional tackle it ensures the job is well done. Of course, this is a given if you hire the right person for the job, so consider the factors we’ve shared with you and put the time and effort you need to look for and hire the right plasterer to meet your needs!

We Plaster & Recruit is a plastering company that offers the best plastering services to meet any needs. Reach out to us today and get your plastering needs met in Brisbane!

Drywall vs Plaster Wall: Which is the Best Option? – Part 2

The debate of drywall vs plaster walls has been around for quite some time. Homeowners are constantly trying to decide which option is best for their homes. There are pros and cons to both drywall and plaster walls, and it really depends on your personal preference as to which one you choose. Let’s continue our discussion on whether you should choose drywall or plaster for your next project.

Is it Cheaper to Install Drywall or Plaster?

If you’re trying to decide between drywall and plaster for your next home improvement project, the cost is likely one of the factors you’re considering. 

The cost of drywall and plaster installation depends on a number of factors, including the type of material, the size of the job, the complexity of the project, and the location. Generally speaking, however, drywall is typically the more affordable option.

The cost of drywall installation is typically lower than the cost of plaster installation for several reasons:

  1. Drywall is a lighter material than plaster, so it’s less expensive to transport and install.
  2. Drywall can be installed by a single person, while plaster installation usually requires two people.
  3. Drywall is a less labour-intensive process overall, so the installation time is typically shorter (and therefore less expensive) than plaster.

Of course, there are exceptions to every rule. In some cases, plaster may actually be the more affordable option. For example, if you’re working with a very small space, the per-square-foot cost of plaster may be lower than the per-square-foot cost of drywall. Or, if you’re working with an irregularly shaped space, the custom-cut plaster boards may end up being less expensive than the standard-sized drywall sheets.

Ultimately, the best way to determine the cost of your project is to get a few estimates from local contractors. Be sure to provide the same details to each contractor so you can compare apples to apples. Once you have the estimates in hand, you can make an informed decision about which option is best for your home and budget.

Should I Replace Plaster Walls with Drywall?

There are a few reasons why you might want to replace your plaster walls with drywall. Perhaps you’re planning a major renovation and want to update the walls and ceiling at the same time. Or, maybe your plaster walls are in bad shape, and you want to start from scratch. Whatever the reason, replacing plaster walls with drywall is a big job. Here are some things to keep in mind before you get started.

Plaster vs Drywall Installation

Another thing to consider is the installation process. Replacing plaster walls with drywall is a big job, so it’s important to make sure you have the right tools and materials. You’ll also need to take the time to prepare the walls before you start. If you’re not prepared, the project can take longer than expected and end up costing more than you planned.

Plaster vs Drywall Repair

Finally, you need to consider the repair process. Plaster walls are very fragile, so they can be easily damaged during the installation process. If you’re not careful, you could end up with cracks or holes in the plaster. Drywall is much more durable, so it’s less likely to be damaged during the installation process. However, it’s still important to take the time to repair any damage before you start the project.

Conclusion

There are many factors to consider when deciding between drywall and plaster walls. Cost, durability, and installation are all critical factors to consider. Ultimately, the best option for you will depend on your specific needs and preferences. If you are considering a home renovation, it is important to weigh all of your options before making a final decision. Talk to a professional contractor to get their opinion on which type of wall would be best for your project.

For your next project, consider working with We Plaster & Recruit, a registered plastering company providing excellent services to our clients in Queensland, Brisbane, and Gold Coast. Our team of painters and plasterers are known to deliver high-quality plastering and gyprock that will highlight your property’s best features. Contact us today to schedule an appointment!

Drywall vs Plaster Wall: Which is the Best Option? – Part 1

Drywall and plaster are two popular choices for wall construction. Both have their own unique benefits and drawbacks that should be considered when deciding which option is right for your project. Let’s look at the differences between drywall and plaster so you can make an informed decision.

What is Drywall?

Drywall is a construction material made from gypsum boards that are covered with paper or fibreglass. It is a popular choice for walls because it is easy to install and provides a smooth, finished surface. Drywall is also relatively fire-resistant and soundproof, making it a good choice for homes and businesses.

What is Plaster?

Plaster is a construction material made from lime, sand, and water that is applied to walls in a wet state and then allowed to harden. Plaster has been used for centuries and is known for its durability and resistance to fire and pests. Plaster walls also have a unique aesthetic that can add character to a space.

What are the Differences Between Drywall and Plaster Walls?

There are a few critical differences between drywall and plaster walls. Plaster walls are much thicker than drywall, so they provide more insulation and soundproofing. Plaster is also much more resistant to fire than drywall.

Plaster walls are made by mixing plaster with water and applying it to the lath (thin strips of wood or metal). The plaster hardens and dries, and the lath provides a support structure. Drywall is made of gypsum board, which is composed of gypsum (a soft mineral) and paper.

Drywall is easier and faster to install than plaster, and it is the more common type of wall finish in new construction. Plaster walls require more skill and experience to install correctly, but they can last for centuries if they are well-maintained.

When deciding between drywall and plaster, it is important to consider the benefits and drawbacks of each option. Drywall is a lot less expensive and easier to install than plaster, but it is not as durable. Plaster is more expensive and more difficult to install, but it offers a higher level of fire and pest resistance. Ultimately, the decision between drywall and plaster will come down to personal preference and the specific needs of your project.

How Do You Choose the Right Type of Wall for Your Home?

Choosing the right type of wall for your home can be a tough decision. There are many different types of walls to choose from, and each has its own set of benefits and drawbacks. In this article, we’ll be comparing two of the most popular types of walls: drywall and plaster. We’ll be looking at the pros and cons of each type of wall so that you can make an informed decision about which is right for your home.

Drywall is a type of wall that is made from panels of gypsum that are nailed or screwed to the studs of a frame. Drywall is a popular choice for many homeowners because it is relatively inexpensive and easy to install. Drywall is also quite easy to repair if it ever becomes damaged.

Plaster is a type of wall that is made from a mixture of water, lime, and sand. Plaster is a more traditional choice for walls, and it has a number of benefits over drywall. Plaster walls are more durable than drywall, and they can be repaired if they become damaged. Plaster also has a more traditional look than drywall, and it can be painted or stained to match your home’s décor.

So, which type of wall is right for your home? The answer depends on your budget, your needs, and your personal preferences. If you’re looking for an inexpensive and easy-to-install wall, drywall is a good choice. If you’re looking for a more durable and traditional-looking wall, plaster is a better choice.

Conclusion

Which type of wall is right for your home will depend on your budget and preferences. If you’re looking for a quick and easy installation, drywall is the way to go. If you’re willing to invest more time and money into your walls, plaster is the better option.

Now that you have an idea of what kind of material you’ll be using for your next project, you’re going to need the help of professionals to install it properly. We Plaster & Recruit is a trusted plastering company providing services and plaster supplies in Gold Coast, Brisbane, and Queensland. Trust us to follow strict protocols and industry standards to breathe in new life to your interiors. Contact us today to schedule an appointment.

7 Quick Steps to Repair Your Cracked Plaster Walls

You’ve got to love plaster. That rock-hard compound, which became mainstream around the 1950s, provides us with seamless surfaces that are mould-resistant, fire-resistant, and noise-deadening. 


However, plaster walls adjust to changes in the foundation and the weather and can experience cracks and breakage. They can get worn down in time, significantly above and next to doors and windows.

Here are seven quick steps in properly repairing and restoring plaster walls: 


1. Assess the Damage


The initial step is to inspect the cracks. If the cracks are small and only surface deep, you may be able to repair them reasonably quickly. However, if the cracks are large or run deep into the plaster, you may need to hire a professional plastering service to fix the issue.


2. Choose the Right Tools and Materials


For starters, you’ll need a good utility knife or a painter’s 5-in-one tool, drywall knives (6-inch and 12-inch), scissors, and a shop vacuum. You’ll also need a joint drywall compound, paper drywall tape, and a sanding sponge (150 grit). 


If the cracks are small, you may only need a putty knife and some spackling compound. You may need a chisel, hammer, and patching plaster for larger cracks.


3. Prepare the Area


When repairing cracks in your walls, the first step is always to clean the surface and remove any loose plaster. Once the surface is clean and ready, you can apply a primer to help the repair material adhere to the wall better. You also need to protect areas you do not want to damage.


Once the cracks are clean, you will need to apply a primer. This will help the repair material to better adhere to the wall.


4. Repair the Cracks


Once the area is prepped, you can begin repairing the cracks: 


  • Score the Crack: Use a good utility knife or a painter’s 5-in-1 tool to cut along the edges of the crack, making it slightly bigger and removing any loose pieces. Don’t force your way into the crack. Instead, scrape slowly and gently. Moreover, use a shop vacuum to get all the dust and crumbs out of the crack.


  • Cut the Paper Drywall Tape: Measure and cut one or more pieces of paper drywall tape to fit the crack. Use scissors or a utility knife to cut the tape. Tearing it by hand would make a jagged edge.


  • Spread the Joint Compound: Using a 6-inch drywall knife, take a small amount of joint compound and spread it over the crack in a thin layer, leaving a path slightly wider than the paper tape. 


  • Tape the Crack: Put the tape on the muck by hand, and then use the 6-inch knife to smooth it out in one or two passes, with no air pockets or wrinkles. Let the joint compound dry all the way through.


  • Sand the Repair: Lightly sand the compound with a 150-grit sanding sponge or sandpaper to eliminate any bumps or ridges you can see. Sand it carefully so that the tape doesn’t show.


  • Apply a Third Coat of Joint Compound (Optional): Using the 12-inch knife, add a third layer of joint compound to make the edges longer. Wait until the joint compound is entirely dry before lightly sanding the area to make it smooth. 


5. Allow the Repair Material to Dry and Sand the Area


Once you have applied the repair material, allowing it to dry completely before proceeding is essential. After the dry repair material, you must sand the area to smooth it out.


6. Apply a Prime Coat and Paint


The final step is to apply paint or sealer to the repaired area. This will help to protect the repair and make it less noticeable. Moreover, this also helps seal the repair and prevent further damage.


Once the repair is complete, you can paint the walls to cover any remaining imperfections.


7. Clean Up and Prevent Future Damage


When you’re finished repairing the cracks, be sure to clean up any leftover spackling compound, joint compound, or sandpaper to help prevent future damage. 


Conclusion


Repairing cracked plaster walls is not as difficult as it may seem. With the right tools, materials, and techniques, you can easily fix the cracks and make your walls look as good as new. 

If you don’t have time to fix your cracked plaster walls and simply want the professionals to do it, We Plaster & Recruit is here for you. We are a registered plastering company offering reliable plastering service that gives you value for your money. We serve the Brisbane, Gold Coast, and Queensland areas, providing quality interior repair and services. Contact us today!

The Top Causes of Cracks in Walls and How to Fix Them

Walls are the most visible and essential parts of your home. They protect you from the external environment and provide support to your property. However, they can show signs of wear and tear over time.


Have you tried contacting a plasterer to inspect your house for cracks in the walls? You might think a slight gap on your wall doesn’t make a difference. After all, it’s small, and there’s no way it can get more apparent than it already is. 


However, there are chances that cracks in walls will become more prominent and worsen over time. This is why it’s essential to pay attention to gaps in walls and fix them as soon as possible.


Typical Causes of Wall Cracks and How to Fix Them


Different things can cause cracks in the walls. The most common are the following:


1. Poor Concrete Mixing


Concrete is one of the prevalent materials used to construct houses. It’s a mixture of water, cement, and aggregates, such as sand or gravel. If the water-to-cement ratio is too high, the concrete will be too soft and susceptible to cracking. On the other hand, if the water to cement ratio is too low, the concrete will be too hard and break.


Concrete shrinks as it dries. If the concrete is not adequately mixed, it will shrink unevenly, causing cracks. The best way to ensure that your concrete mixes properly and shrinks evenly is to follow the instructions on the bag or from your contractor. Make sure you mix the right amount of water thoroughly before adding the concrete mix.


2. Temperature Changes


The walls of your home are constantly expanding and contracting due to temperature changes. This can cause cracks, which are more noticeable during the winter months when the temperature drops. Furthermore, the expansion and contraction of your walls can also cause nails to pop out, which can be unsightly and dangerous.


The initial thing you need to do is clean out the cracks. This will help the sealant or weather stripping adhere better. Next, fill the gaps with sealant or place weather stripping over them. Make sure to smooth it out so that it lies flat against the surface.


3. Shifting Foundations


While cracks in walls may not always cause alarm, if you notice them, it’s crucial to have a professional evaluate the situation to decide whether or not they pose a structural threat. In some cases, cracks are simply cosmetic and can be easily repaired. However, more comprehensive repairs may be necessary if the damages indicate a more severe problem, such as foundation instability.


If you notice cracks in walls that run vertically, this is a sign that the foundation is shifting. To fix this, you’ll need to have the foundation repaired by your local plasterer. They can replace the cracked material with new, stronger concrete to stabilise the foundation and prevent further cracking.


Final Thoughts


There are several reasons cracks might form in your walls, and it’s essential to pinpoint the cause before trying to fix it. Some of the most frequent causes of cracks include settlement, thermal expansion and contraction, and poor construction.


If you spot any cracks in your walls, it’s vital to have them inspected by a plasterer to determine the cause. Once the reason has been worked out, you can take steps to fix the problem and prevent future damage.


We Plaster & Recruit provides affordable and high-quality plastering services in Brisbane for your wall crack issues. Request a quote today!

6 Types of Textured Ceilings to Consider for Your Home

The ceiling is an important part of the home, but it goes beyond functionality. If you wish, you can enhance your ceiling’s aesthetics and make its style enhance the overall look of your home. One way to make your ceiling complement the rest of your home’s design is through textured ceilings.


There are many different types of textured ceilings to consider for your house. Each type has its own unique benefits and drawbacks that you should take into account before making a decision.


In past years, people often opted for vermiculite ceilings, also known as popcorn ceilings. To achieve its texture, people had to use a spray. However, when the design became aged and it was found that the asbestos in the spray had harmful effects, people became discouraged in choosing this option.


So, what type of textured ceiling should you go for? Here are six of the most popular types of textured ceilings to consider for your home.


1. Timber Panel Ceilings


Timber panel ceilings are a popular choice for those who want to add some texture to their ceiling. Timber panels can be made from a variety of different woods, including pine, oak and cherry. They can also be stained or painted to match the rest of your home’s decor.


2. Smooth Classic Ceilings


Smooth classic ceilings are a popular choice for those who want a clean, simple look in their home. These ceilings can be made from a variety of materials, including plaster, gypsum board and even wood. They can also be painted, stained or left white.


3. Victorian Stucco Ceilings


In many heritage buildings, you can notice a similar ceiling style—the Victorian stucco or the plaster ceiling rose. This look is present in more vintage buildings and commercial areas. With its beauty, people opt to restore them instead of remodelling them. Overall, its distinct artistry is worth preserving and adds personality to any property.


4. Hawk and Trowel Textured Ceilings


In this type of textured ceiling, you will use a hawk and trowel to design your ceiling. Because of this style of texturing, the output looks rougher and more natural. Though you can attempt this styling on your own, it is still recommended to work with a professional plasterer to have the best possible output.


5. Stipple Ceilings


To achieve the stipple brush pattern on your ceiling, you need to use tools like a roller and a slap brush. Aside from its beautiful aesthetics, it is recommended to use stipple designs if your ceiling has holes, dents, and uneven surfaces.


Though stipple patterns seem to be simple, it is still not an advisable DIY project. Doing it yourself might give a sloppy outcome. With professionals, the finish will be better and elevate your home.


6. Coffered Ceilings


Coffered ceilings are a great way to add some interest and depth to your ceiling. These ceilings have panels that are recessed into the ceiling, creating an illusion of depth and dimension. Coffered ceilings can be made from a variety of materials, including wood, plaster and even metal.


Final Thoughts


There are a variety of textured ceilings to consider when planning to update your home. Each type of texture has its own unique benefits that can add value to your home. With so many options to choose from, it is important to consult with a professional to determine which type of texture would be best for your home.


If you’re looking for plastering companies in Gold Coast for your textured ceiling, We Plaster & Recruit is the ideal partner for you. Our team of professionals can handle all types of plastering, including difficult repairs. Message us to request a quote today.